Assignments
Assignments are how you distribute work to your class, collect student submissions, mark them with snippet-based feedback and AI assistance, and review the results afterwards. They sit inside a class and are the core of day-to-day teaching in ren. — once your class has students, creating and marking assignments becomes your main activity.
Assignments are distributed to the students in a class, so make sure your class has students in it. See Students for how to add and invite them.
ren. supports two assignment types: Essay (open-ended writing) and QnA (structured questions, scored per question). Behaviour that differs between the two is flagged below with (Essay only) or (QnA only).
Creating an Assignment
-
Open the Classes tab in the sidebar and click into the class you want
-
Click the
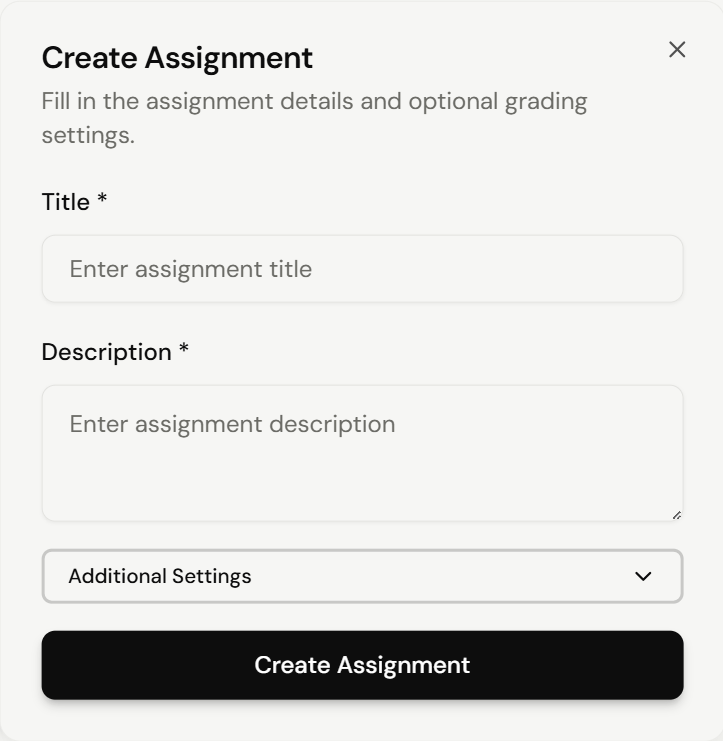
Add New Assignmentbutton at the top right to open the Create Assignment dialog. Fill in:- Title — the assignment name shown to students
- Description — a short summary and any extra instructions
- Click
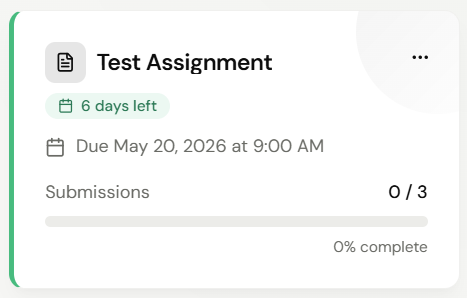
Create Assignment. Your new assignment appears as an Assignment Card on the class page
Additional Settings
The Create Assignment dialog includes an Additional Settings panel that expands to reveal more options:

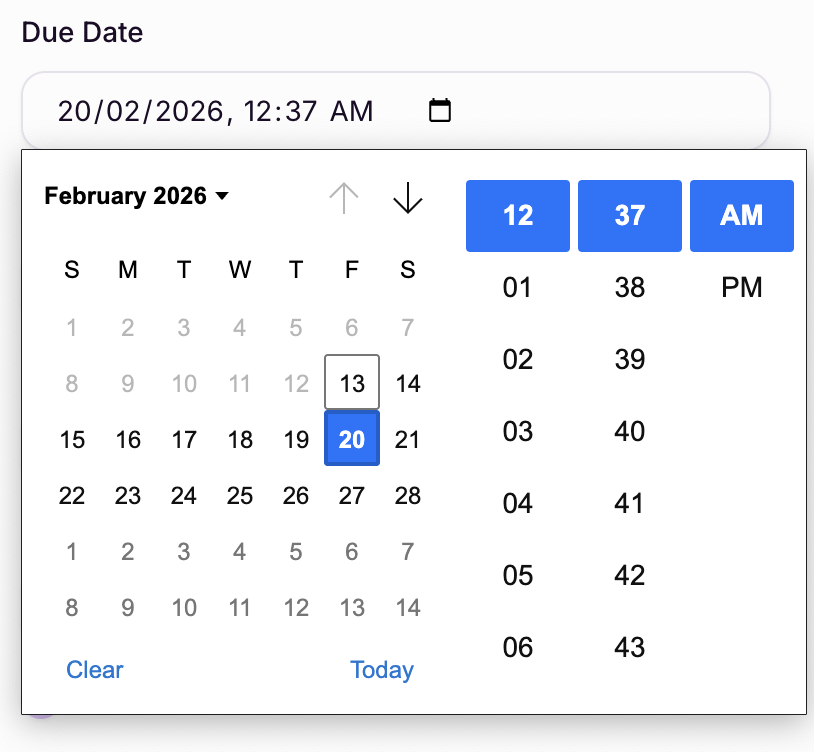
Due Date
Set the date and time by which the assignment must be complete. Defaults to one week from today; both date and time are required.
Paper Type
A short label (e.g. Paper 1, Paper 2, Essay) used to categorise the assignment. Helps you and your students identify the task at a glance and is useful for filtering across a class. Paper types are configured per subject by your organisation's admin — you'll only see options here if your class's subject has any defined.
Answer Scheme
Upload a PDF of your marking guide. The AI copilot uses it when suggesting annotations and feedback. Once uploaded, ren. extracts the marking criteria automatically — see Reviewing the Answer Scheme below to check what the AI saw and adjust it.
Custom Grading Prompt
Select a pre-configured prompt to change how the AI marks this specific assignment. Custom prompts set up on the Memory page appear in the dropdown; if none is selected, the AI uses the default.
Create for Multiple Classes
Assign the same task to several classes at once instead of just the current one. Selecting multiple classes hides Select Students and distributes the assignment to every student in each selected class.
Select Students
By default, an assignment goes to every student in the class. Use this dropdown to target specific students — for example, for differentiated tasks or catch-up work.
Adding Reference Files
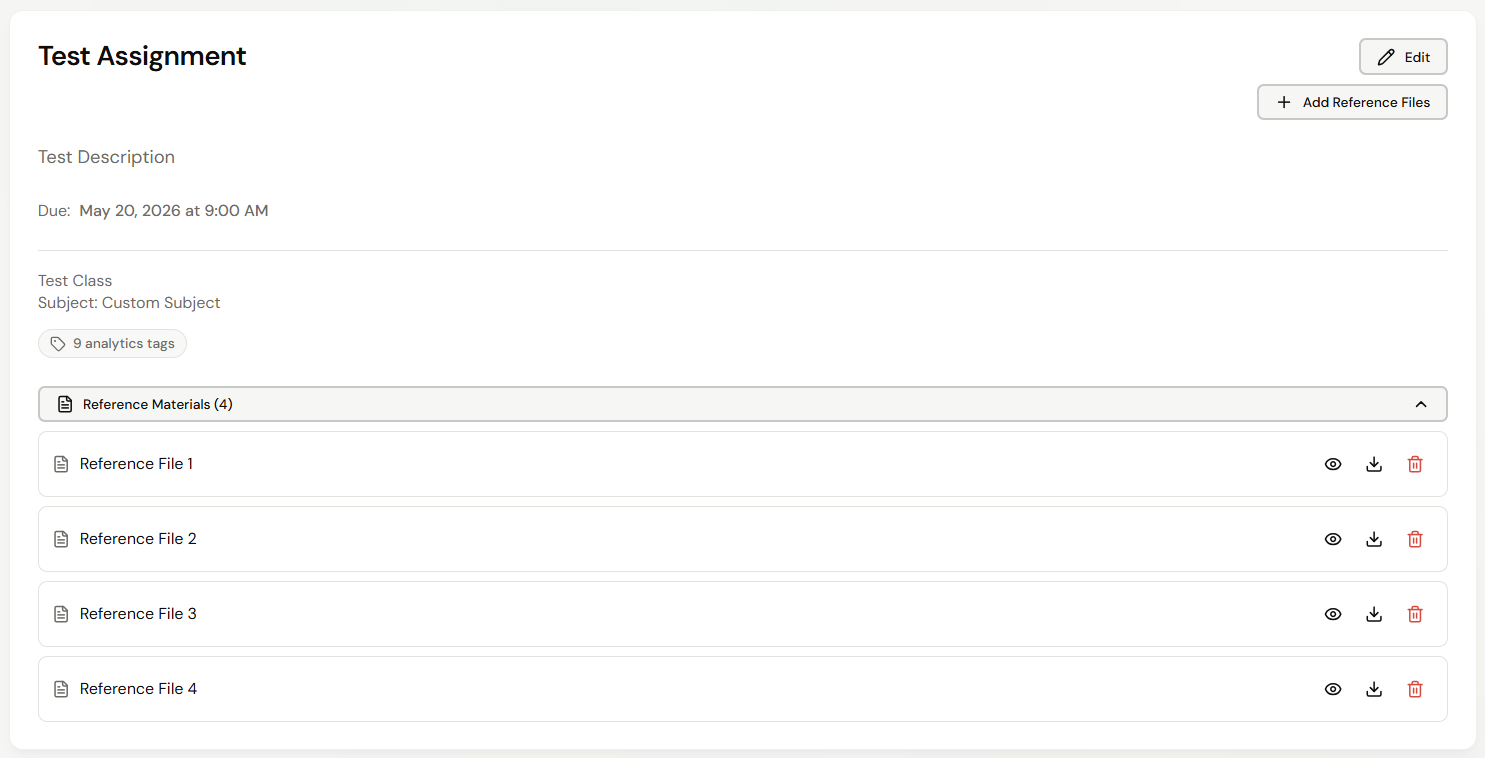
- Open the assignment to view its Assignment Detail Card, then click the upload button to attach Reference Files for students
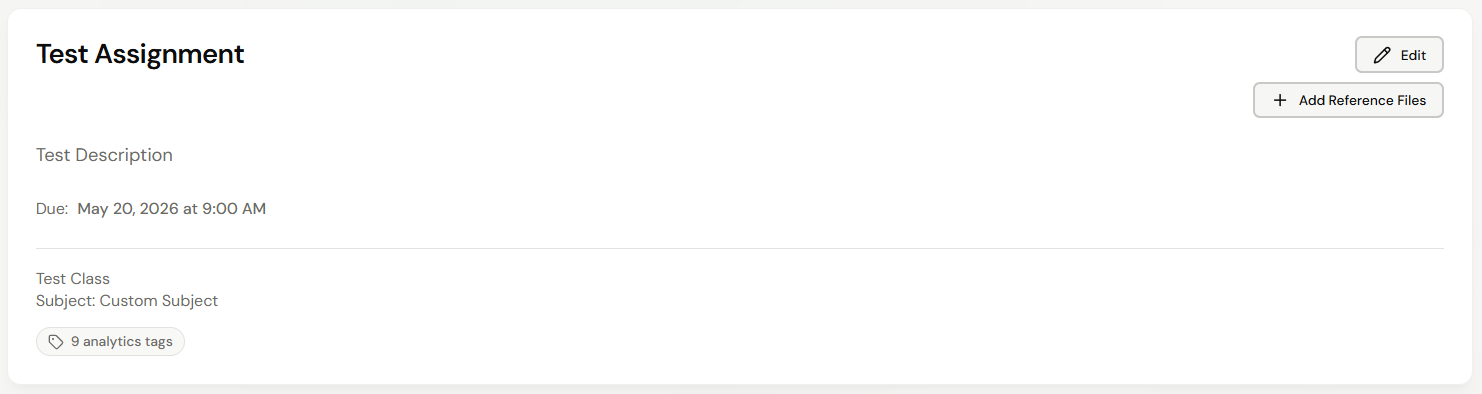
- Students access the files from a dropdown at the bottom of the same card
Editing and Deleting Assignments
Open the ... menu at the top right of the Assignment Card for Edit and Delete options, or click the edit icon on the Assignment Detail Card to edit directly.
Reviewing the Answer Scheme
Once your answer scheme has been uploaded and processed, ren. extracts the marking criteria the AI will use. Buttons on the Assignment Detail Card let you check what the AI saw and adjust it:
View Answer— opens the original answer scheme document you uploaded (view-only)Essay Guide— opens the AI's extracted essay grading guide (Essay only)AI Extracted— opens the AI's extracted question-level marking criteria (QnA only)
In the dialog that opens:
- Click
Editto modify the grading guide directly, thenSaveto confirm orCancelto discard - Click
Re-extractto ask the AI to re-process the uploaded PDF from scratch (QnA only)
For best results, mark 1-5 student submissions first and review the AI's grading on those. If anything looks off, edit the grading guide via Essay Guide or AI Extracted to adjust the marking criteria — then mark the rest of the class.
Essay assignments also show a Components panel on the Assignment Detail Card listing each grade component (e.g. Content, Language) and its max score. Edit them with the pencil icon while no work has been submitted yet — once any student moves into Pending Marking or beyond, the panel locks and reads Locked once marking has begun.
Marking Submissions
Submission Status
- Open the relevant assignment — either from your Classes sidebar, or by clicking its Assignment Card on the class page
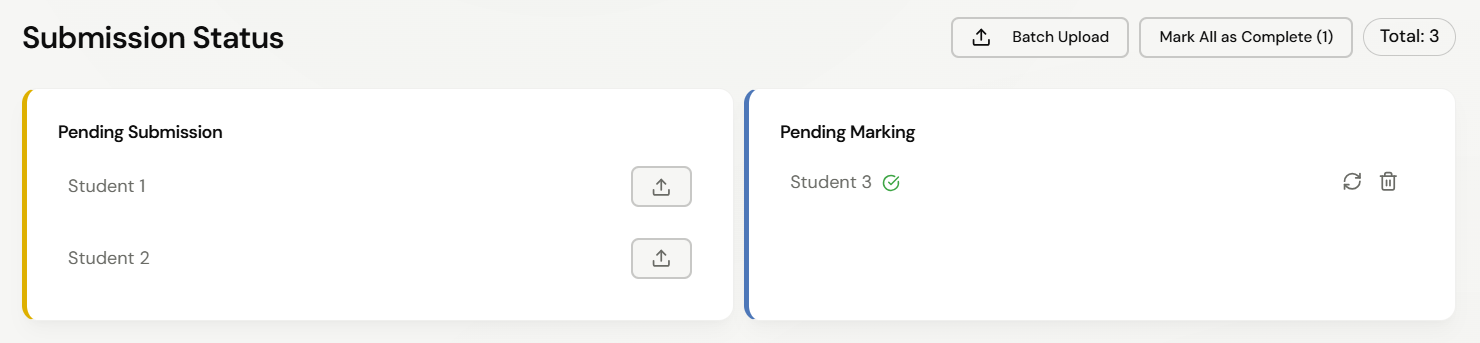
- On the assignment page, students are grouped by status — Pending Submission for those who haven't submitted yet, and Pending Marking for submissions ready to be marked
- Submissions are AI-graded automatically as soon as they're uploaded; the row moves from Pending Submission to Pending Marking once processing completes
Uploading on a Student's Behalf
If a student hands in a paper copy or otherwise can't submit through their portal, you can upload directly from the Pending Submission section:
- Find the student's row
- Click
Uploadand drag in their work — PDF, Word, image, or even photos of paper
ren. automatically converts any handwriting into digital text and processes the file as a normal PDF submission. Their row then moves to Pending Marking ready to mark.
Batch Upload
To upload submissions for several students at once, click Batch Upload in the Pending Submission section. The Batch Upload Submissions dialog accepts either:
- A single combined PDF of every student's submission — ren. splits it into individual submissions via
Auto-detect cover pages(uses the student ID cover page with shaded bubbles to find each submission's start) orFixed page count(specify a fixed number of pages per student) - Individual files, one per student — ren. auto-detects the student ID when each file starts with the cover page
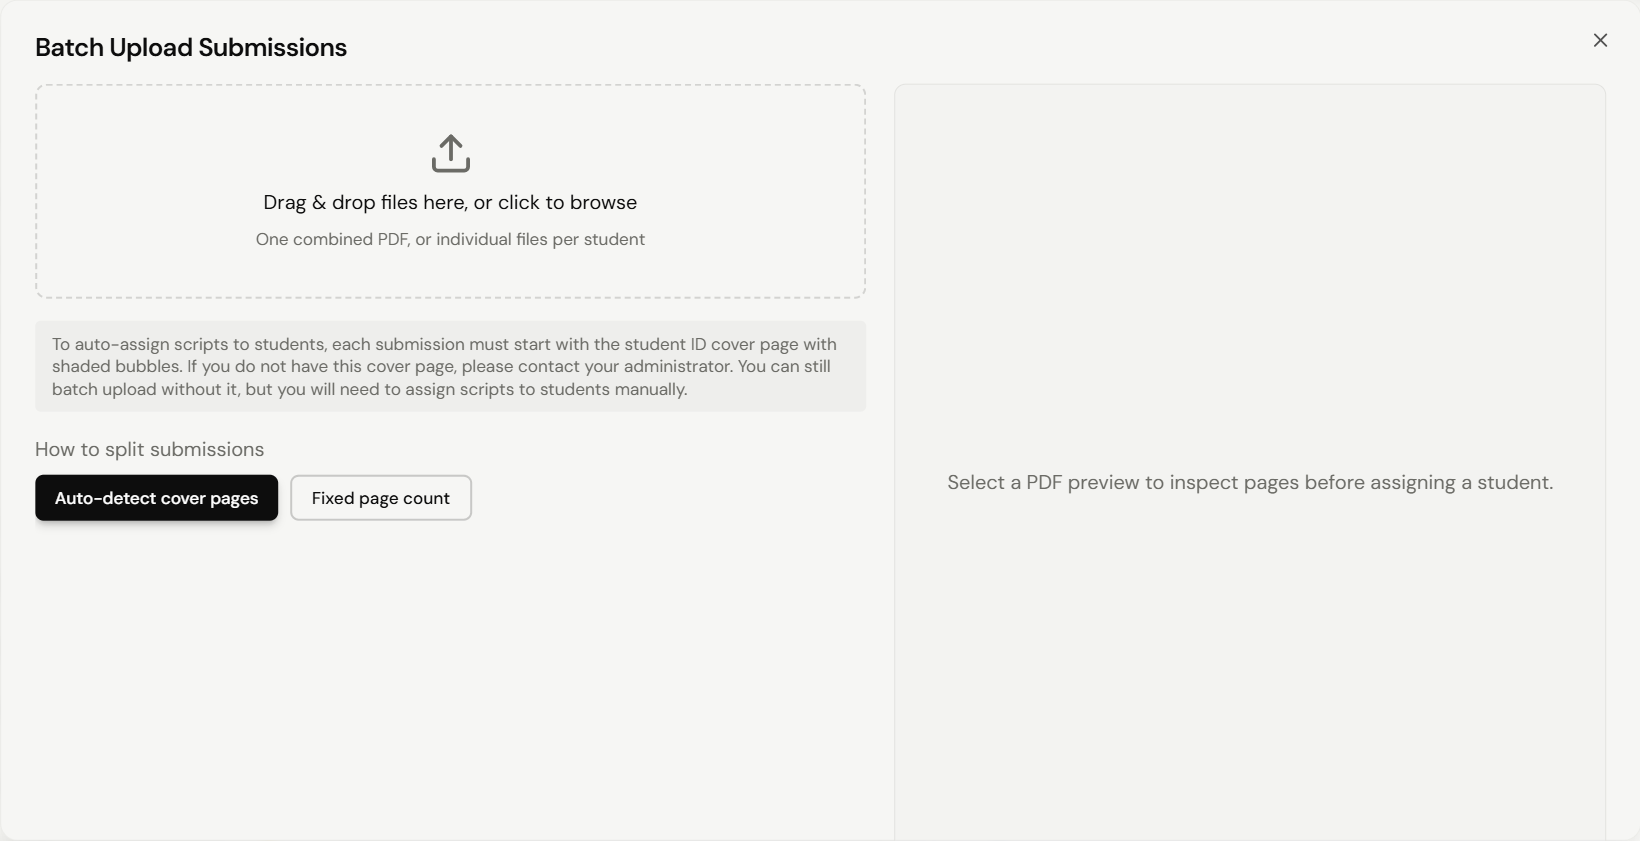
After uploading, choose Upload & Process to auto-assign files using the detection method, or Upload & Assign Manually to assign each file to a student by hand — useful when you don't have the cover page.
Opening to Mark
- In Pending Marking, submissions with a green tick have already been processed — open one to review, edit, and accept the AI's suggestions before finalising
- Click a student's name or submission card to open the marking interface
The Marking Interface
The toolbar across the top has the following controls:
- Mode dropdown (defaults to
Select) — switch between three modes:Select— for creating snippets and clicking annotationsDraw— for freehand annotationsComponent— for placing tick or cross markers
Accept All— accept every AI-suggested annotation on the current submissionRe-mark with AI— send the submission back for a fresh round of automated grading- Page navigation — move between pages (e.g.
3 / 27) - Zoom slider — adjust zoom for closer inspection
- View toggle — show or hide AI annotation overlays
Export PDF— download the current submission as a PDF- Fullscreen marking mode — expand the marking interface to fill the screen
The Questions panel below the toolbar lists every question from your answer scheme (QnA only). Click any button to jump to it — purple outlines mark visited questions; red ones mark extension or bonus questions. Collapse the panel to give the PDF more space.
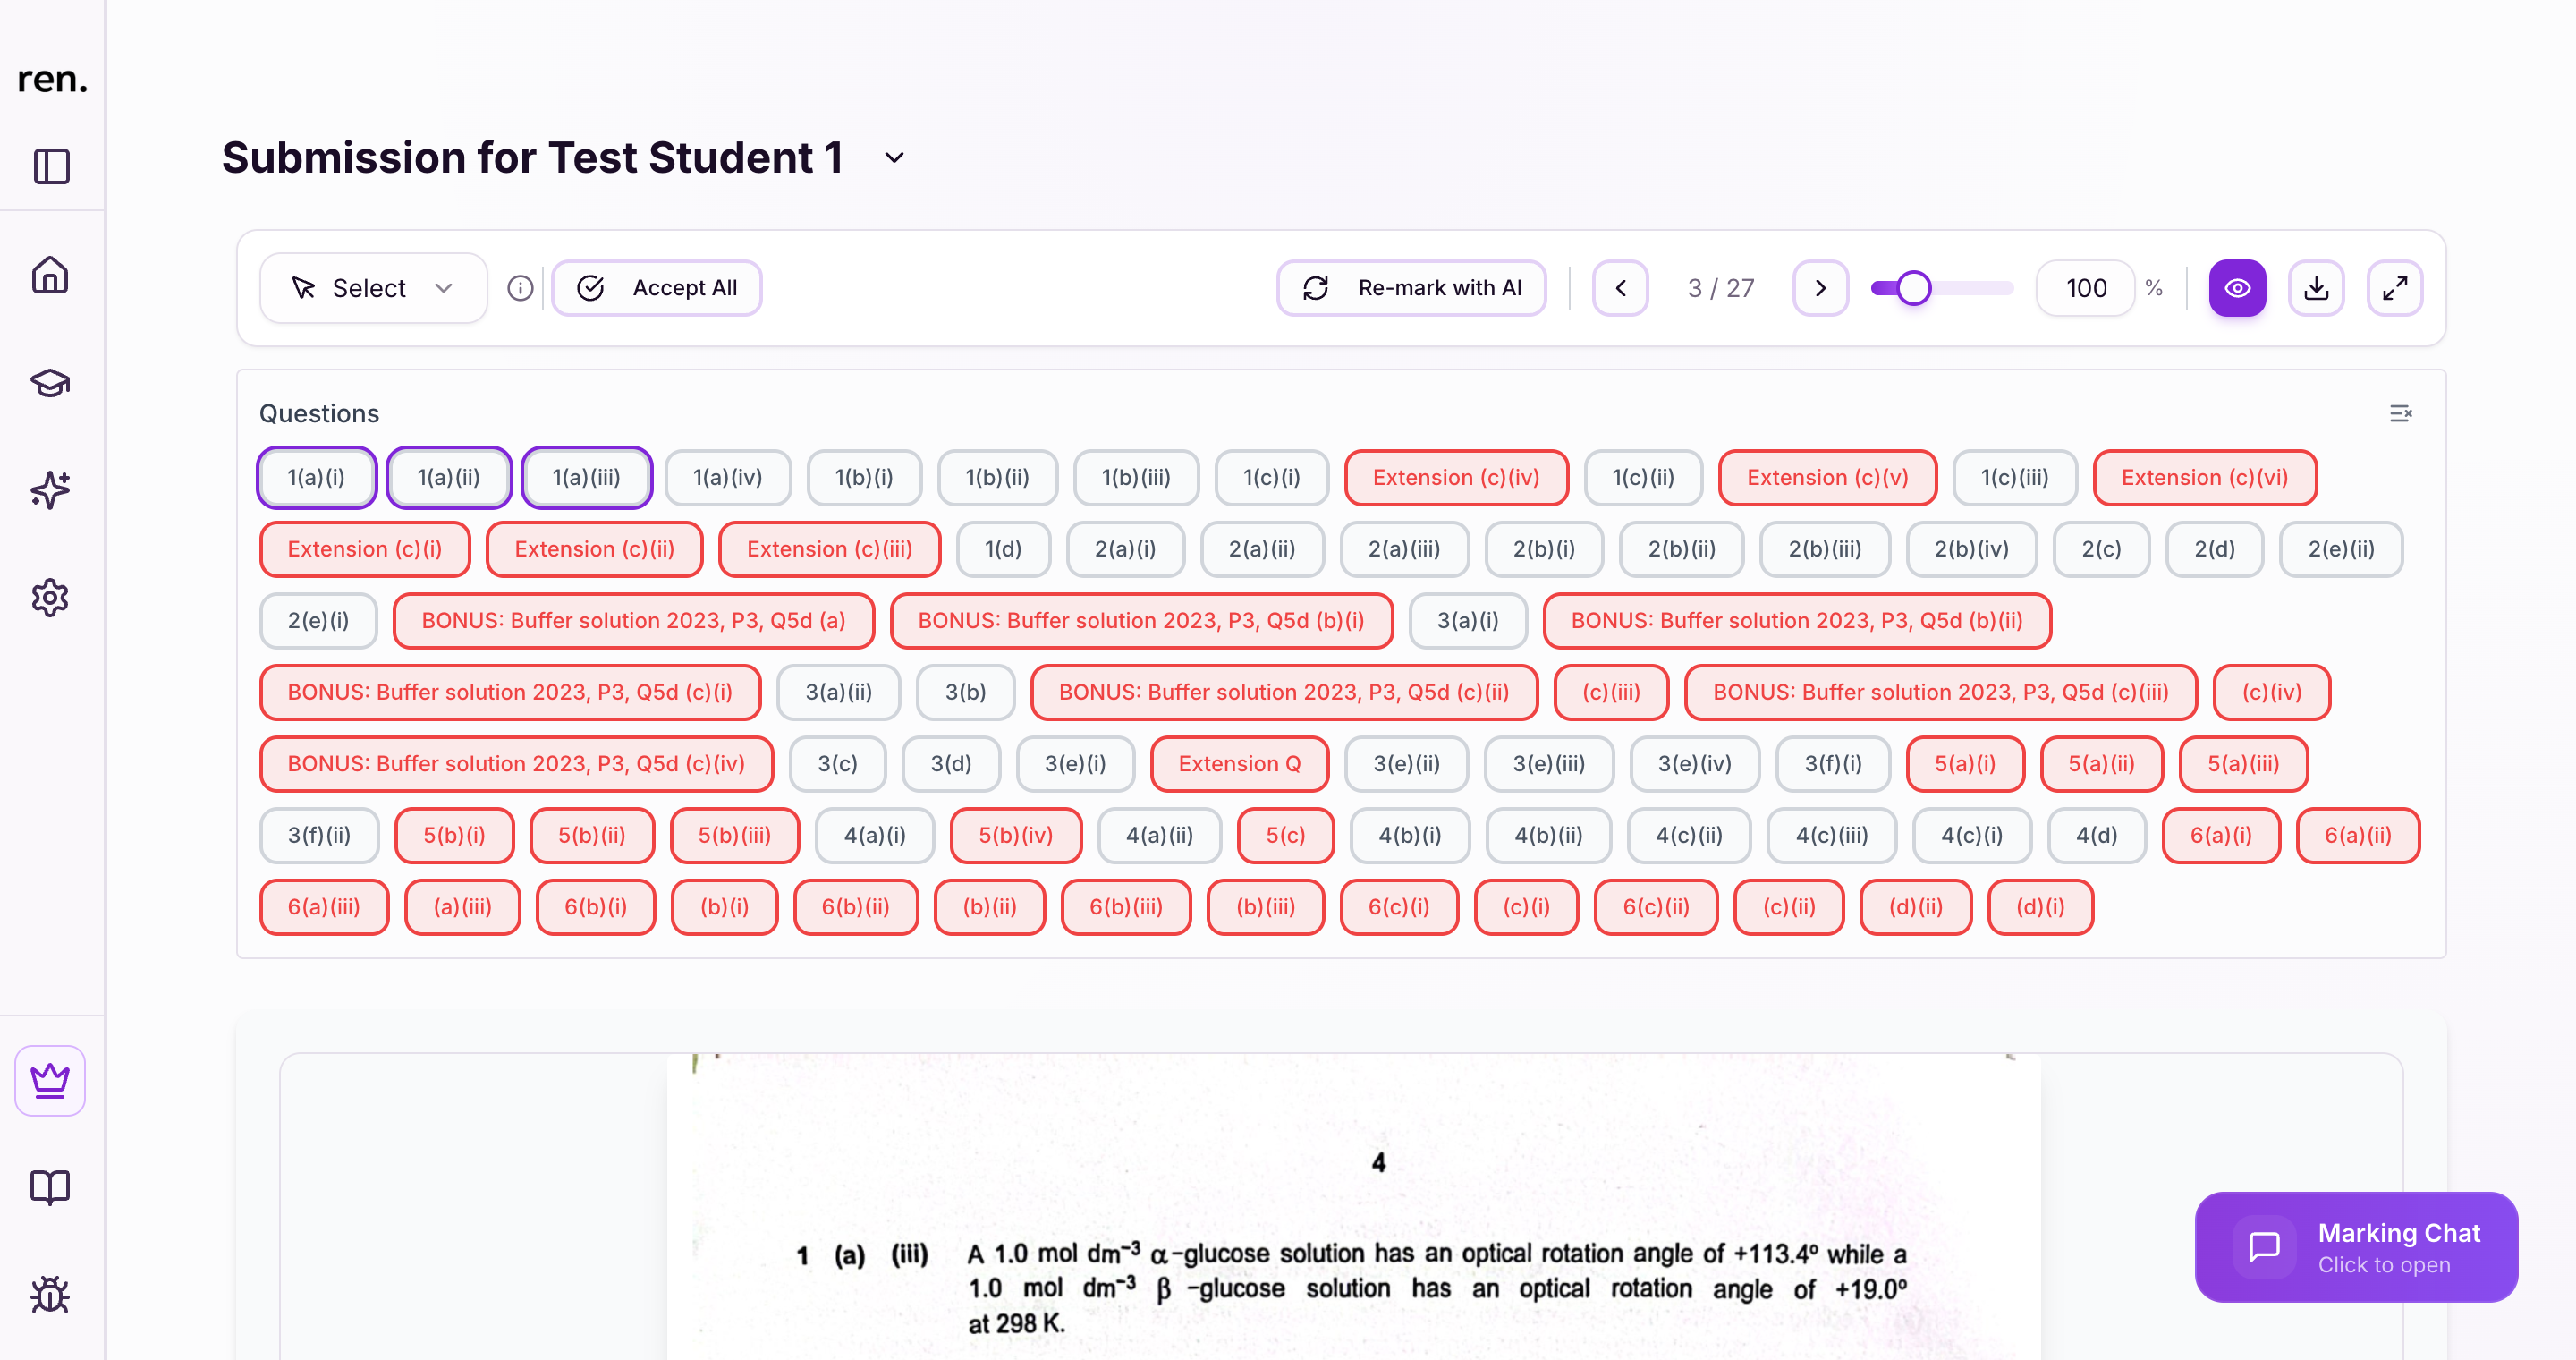
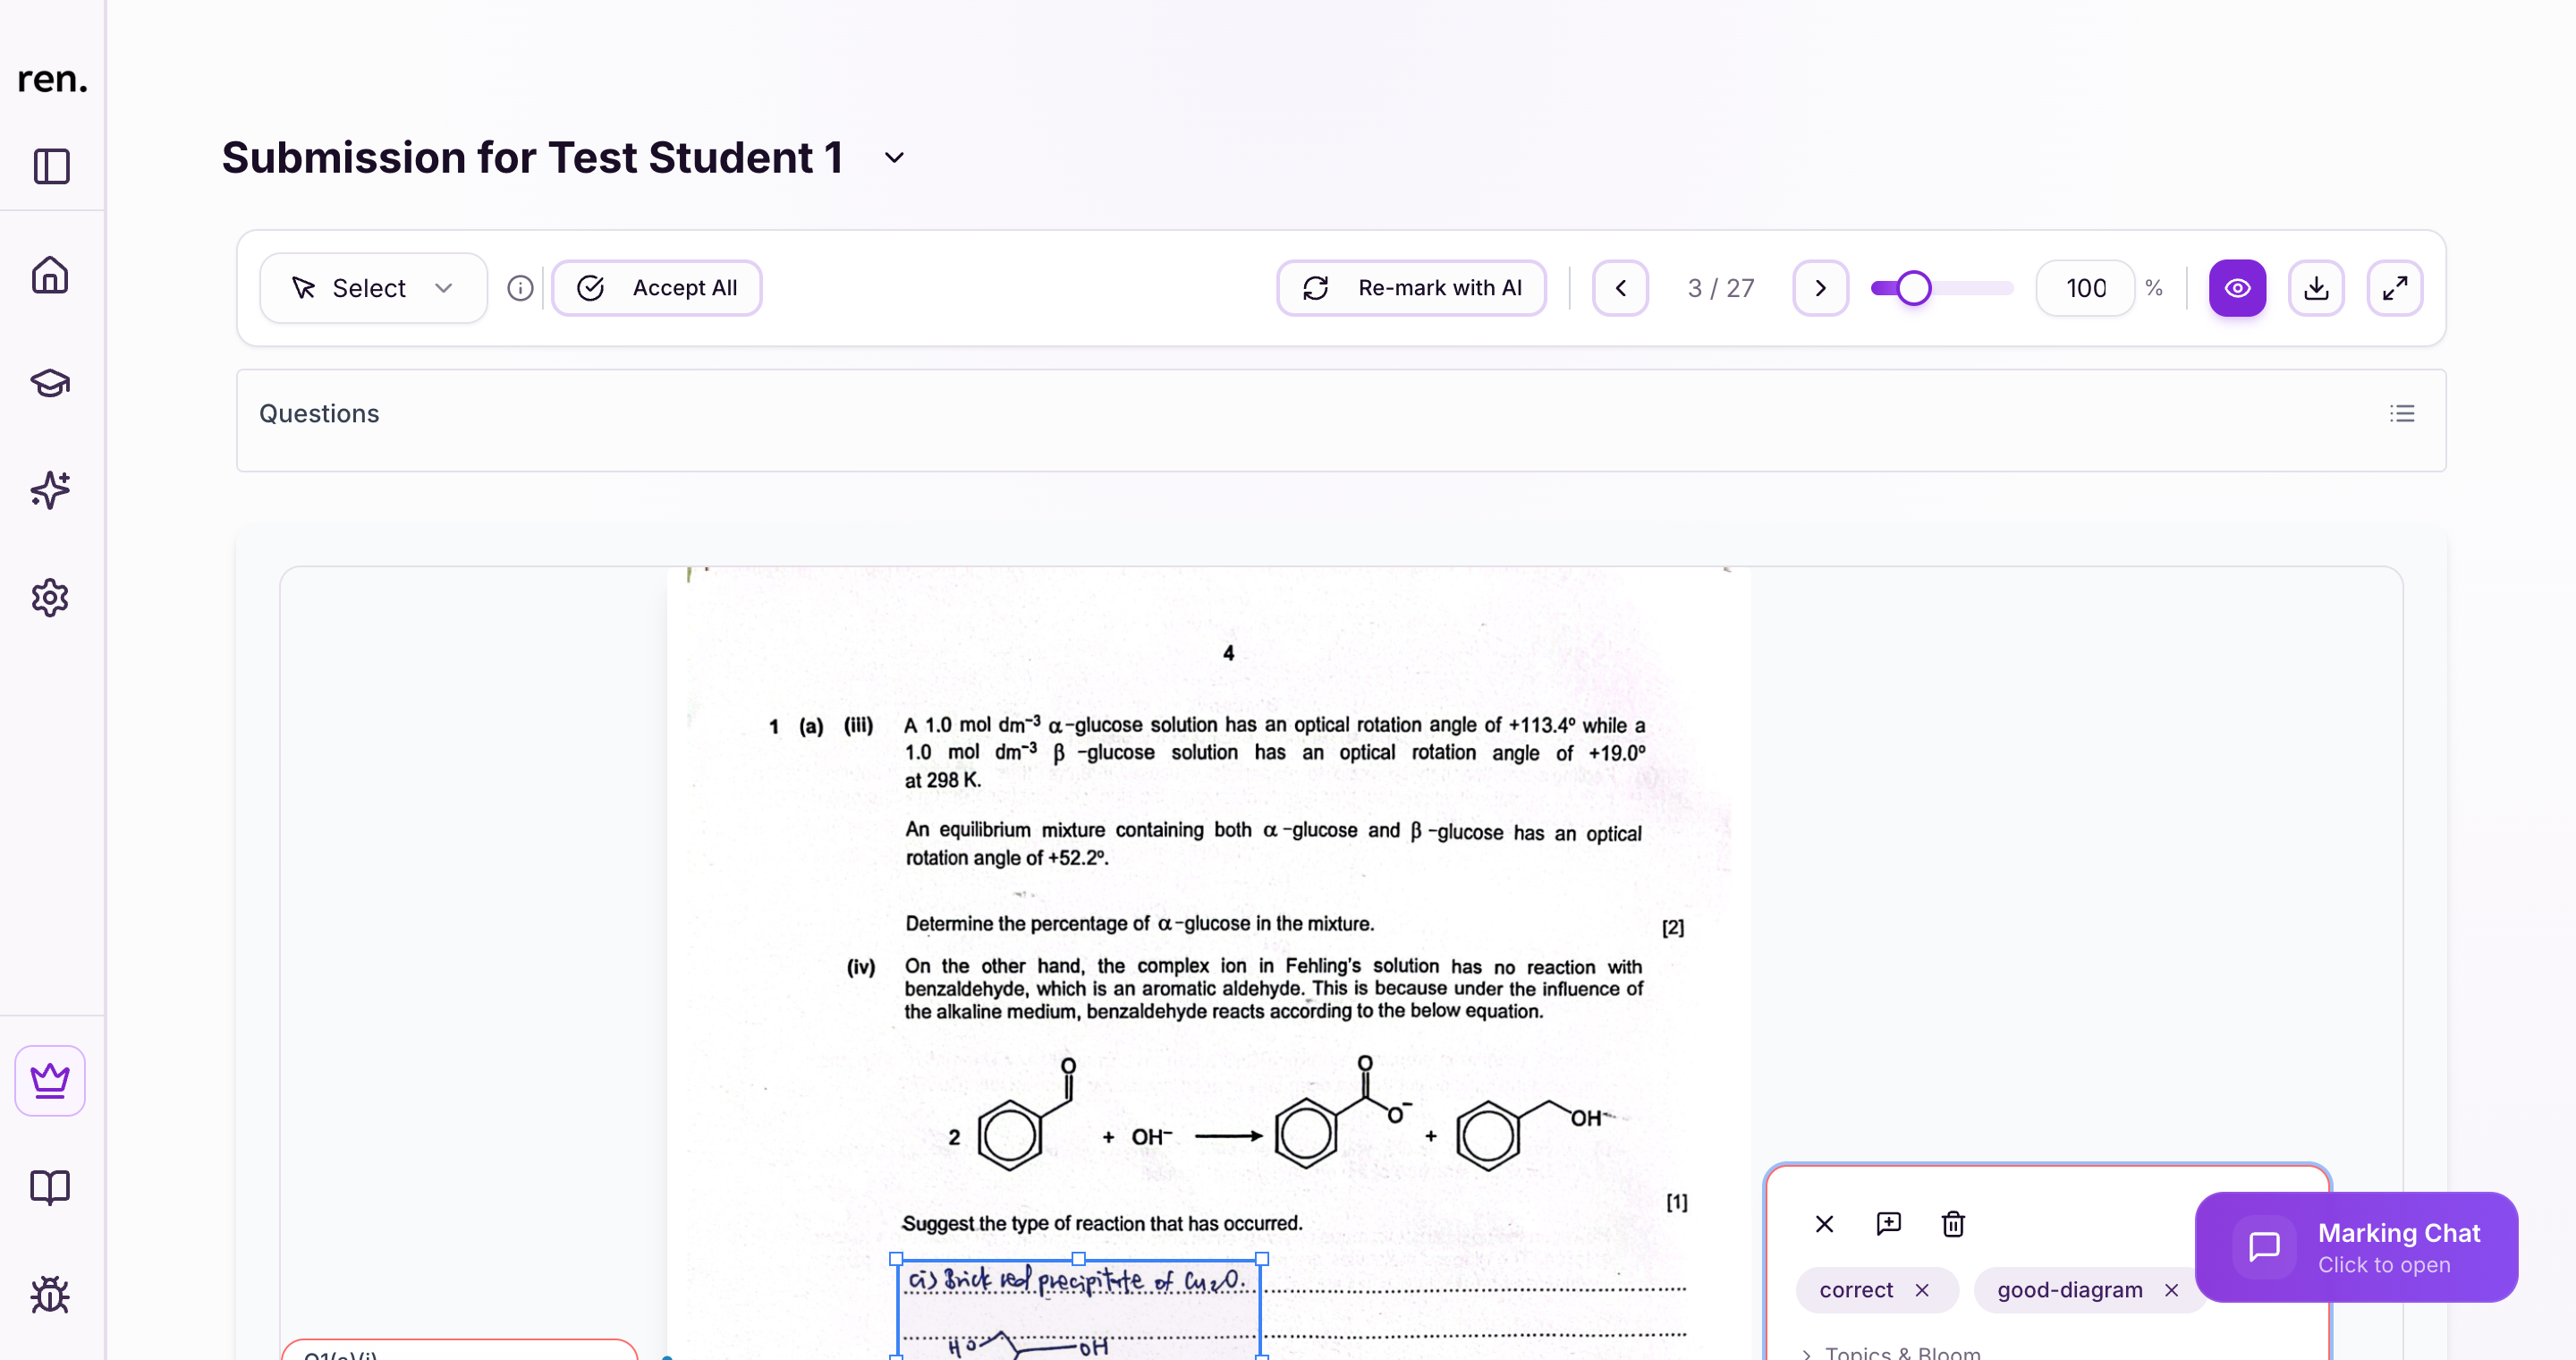
Annotations appear as labelled overlays on the PDF. For QnA assignments, labels reflect the question (e.g. Q1(a)(i)). Selecting one opens its details in the right-hand panel.
Working with Annotations
The AI creates annotations automatically:
- For QnA assignments, it maps answers to questions using the uploaded answer scheme
- For Essay assignments, it generates feedback on writing and phrasing
You can also create your own annotations at any time by dragging across the student's work.
To create a new snippet:
- Make sure
Selectmode is active - Click and drag over any part of the student's work
- The annotation panel opens on the right where you can add in your comments
To review or edit an existing annotation:
- Click any annotation label on the PDF
- The annotation panel opens on the right
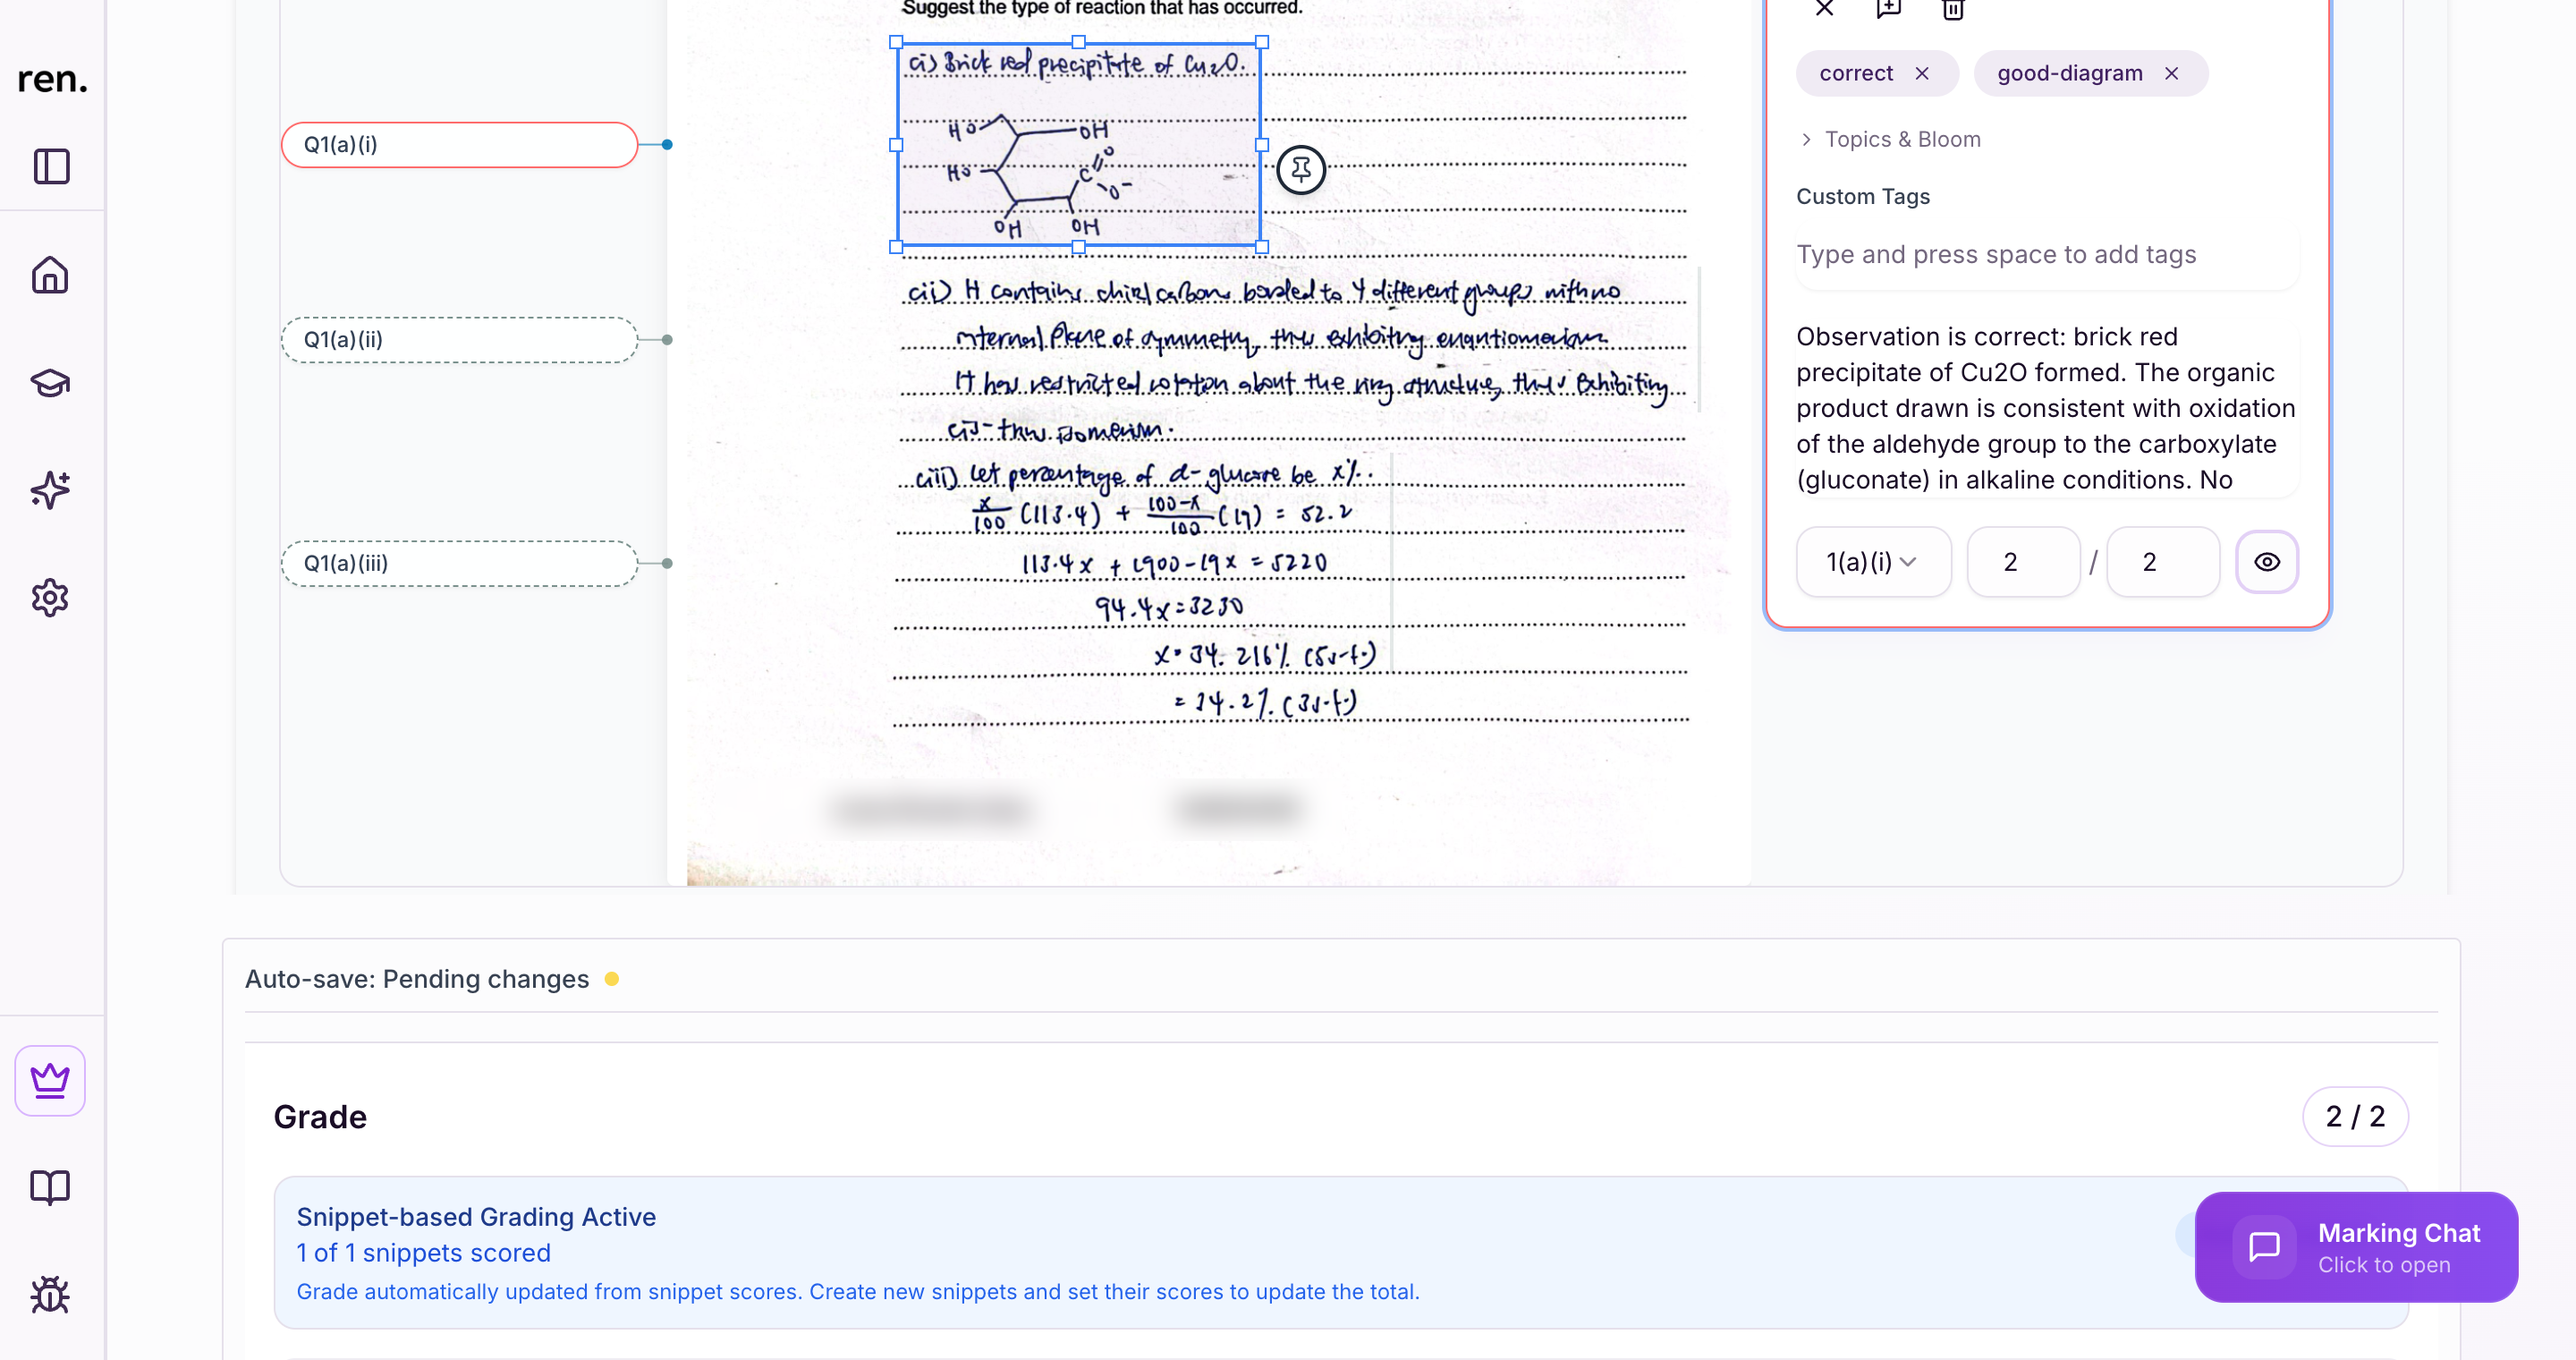
The Annotation Panel
Each annotation has:
- AI-applied tags (read-only) — labels the AI attaches automatically. They appear as badges on the snippet
Add to chat— push this snippet into the Marking Chat to ask the AI about itDelete snippet— remove the annotation entirelyView AI interpretation— expand to see the AI's transcription of the snippet (text and/or diagram description). Only available for snippets the AI has processed- Topics & Bloom — tag which topic the annotation covers (for subjects with distinct topics)
- Comment — your feedback for the student, pre-filled by the AI and editable. Auto-saves every few seconds as you type
- Question and score (QnA only) — pick the question the snippet belongs to and set the score awarded out of max (e.g.
2 / 2)
Marking Chat
- Click
Marking Chatin the bottom-right corner to open a chat that has full context on the current submission
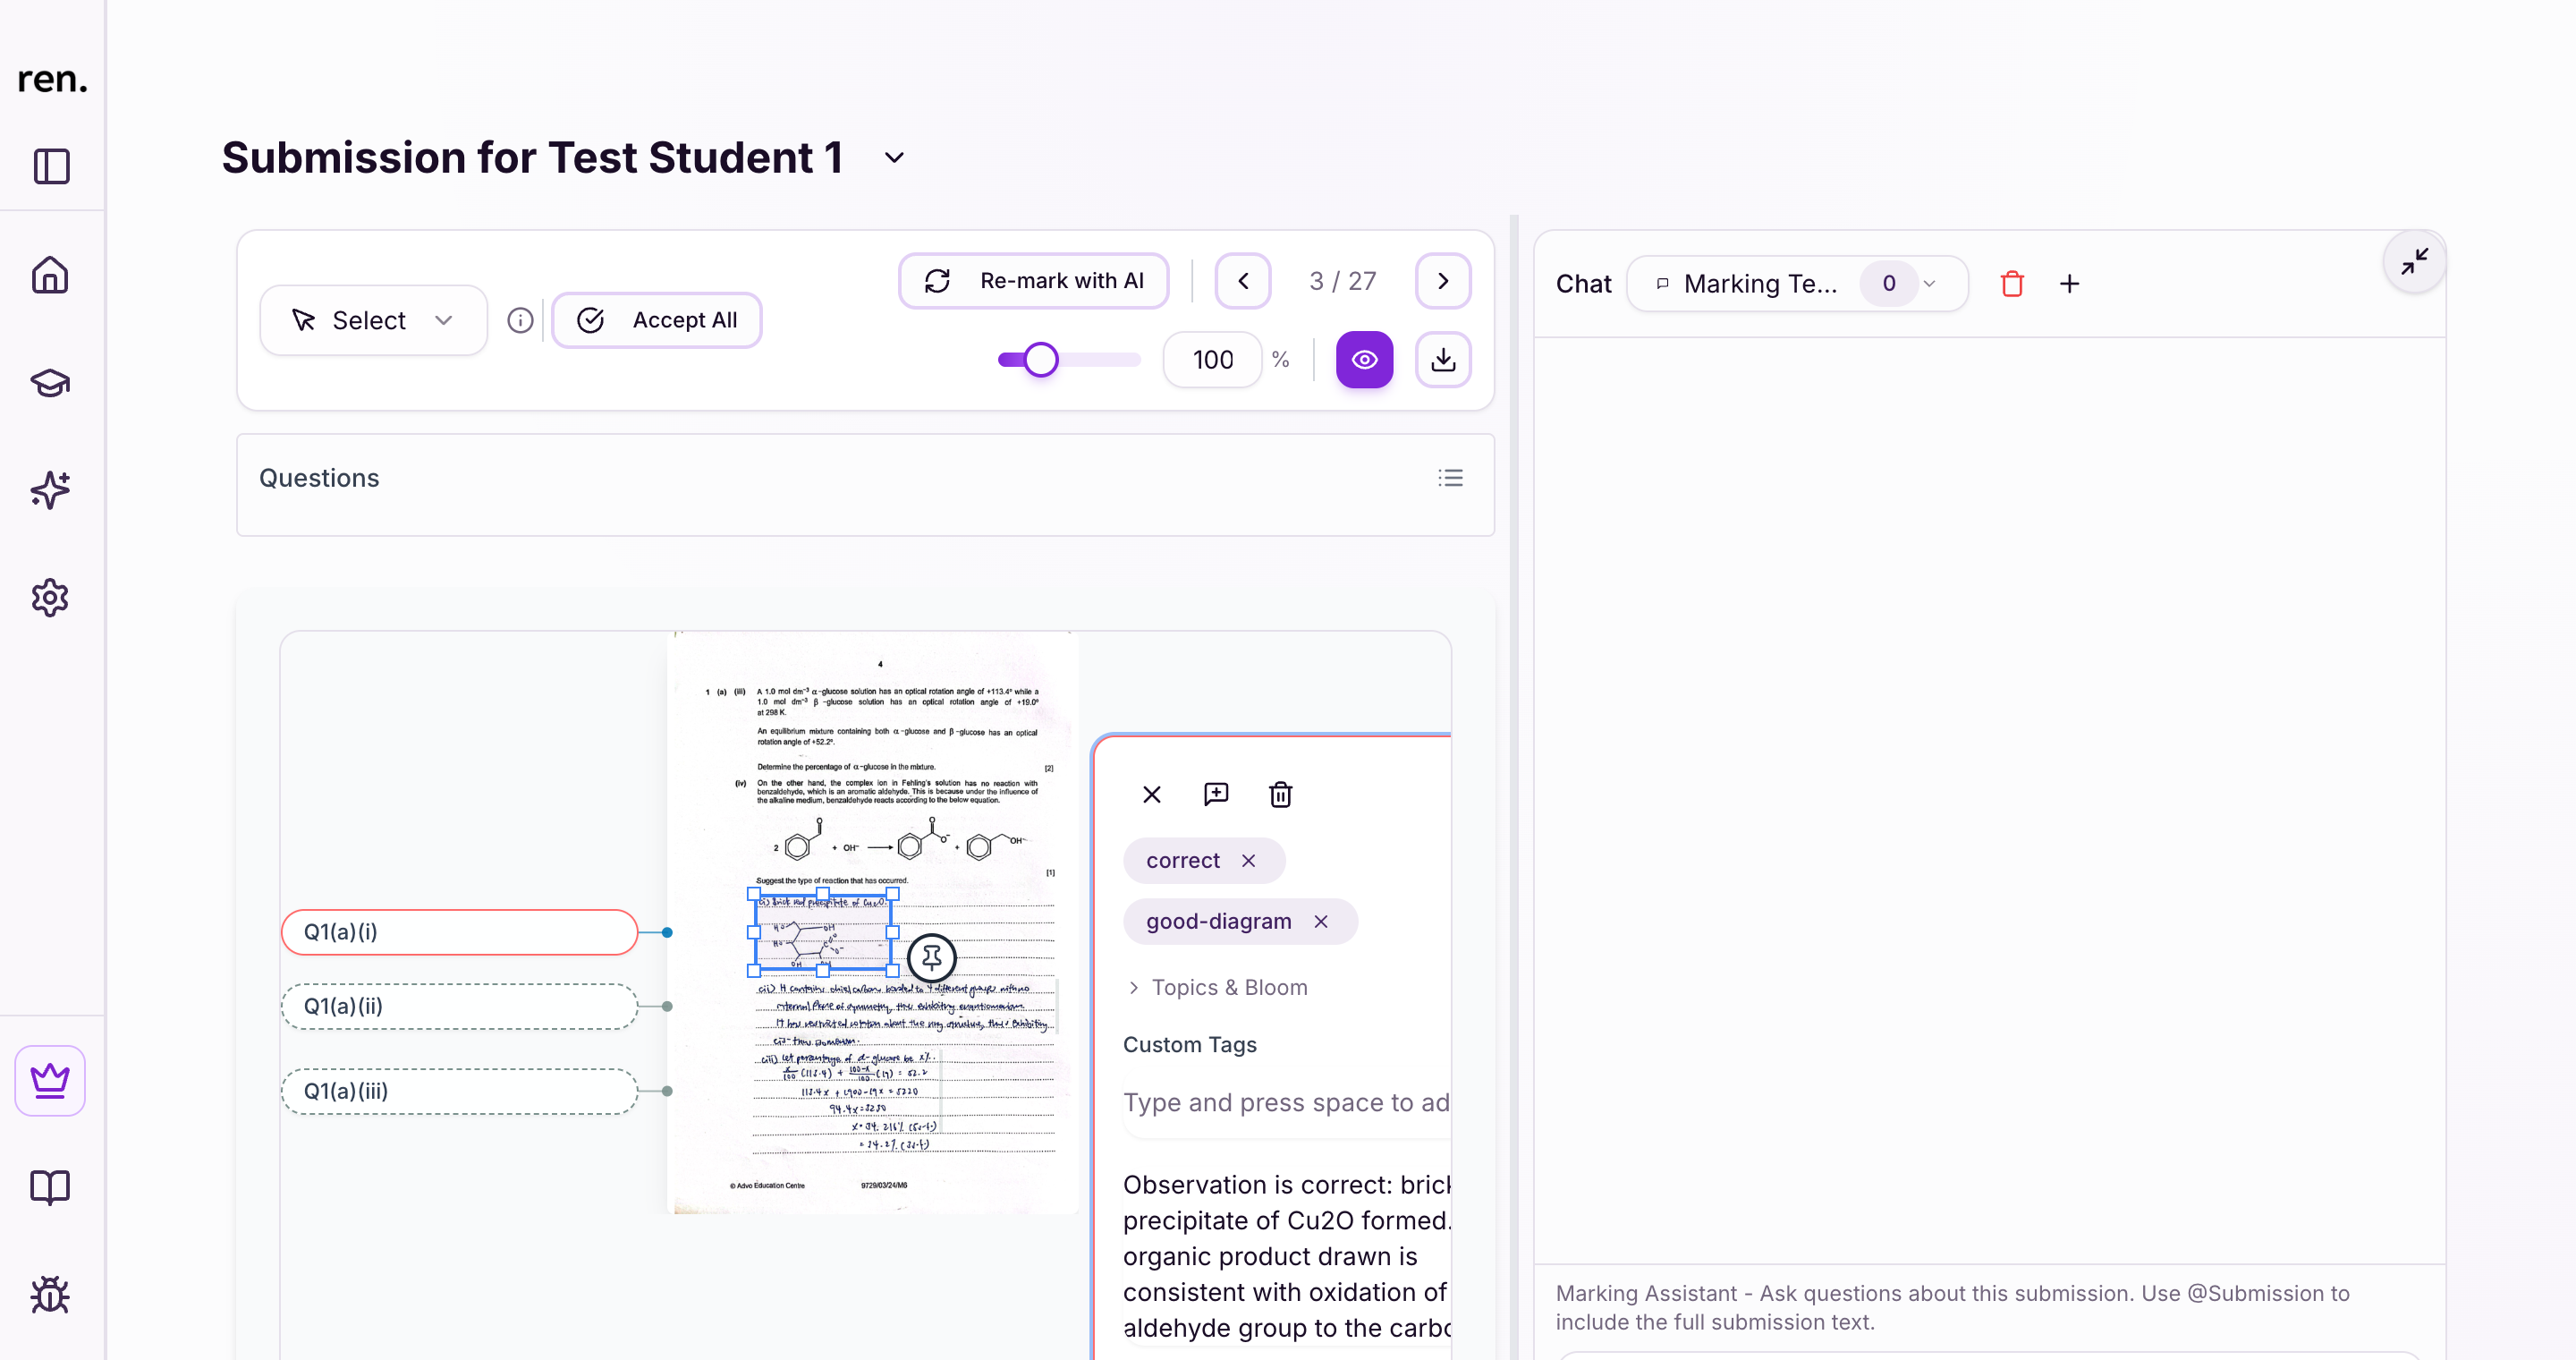
Use it to:
- Ask about the student's approach or reasoning
- Request a strengths/weaknesses summary
- Use
@Submissionto include the full submission text for deeper analysis
Grading and Grade Components
The Grade panel sits below the PDF and annotation workspace. How the overall grade is entered depends on the assignment type:
- Essay assignments — enter the score directly in each grade component, or use AI-suggested scores. Click the suggestion badge next to a component to apply that score, or click
✦ Use all AI suggestionsbelow the components to apply them all at once - QnA assignments — the overall grade is calculated automatically from snippet scores as you add or edit them. The overall field is read-only
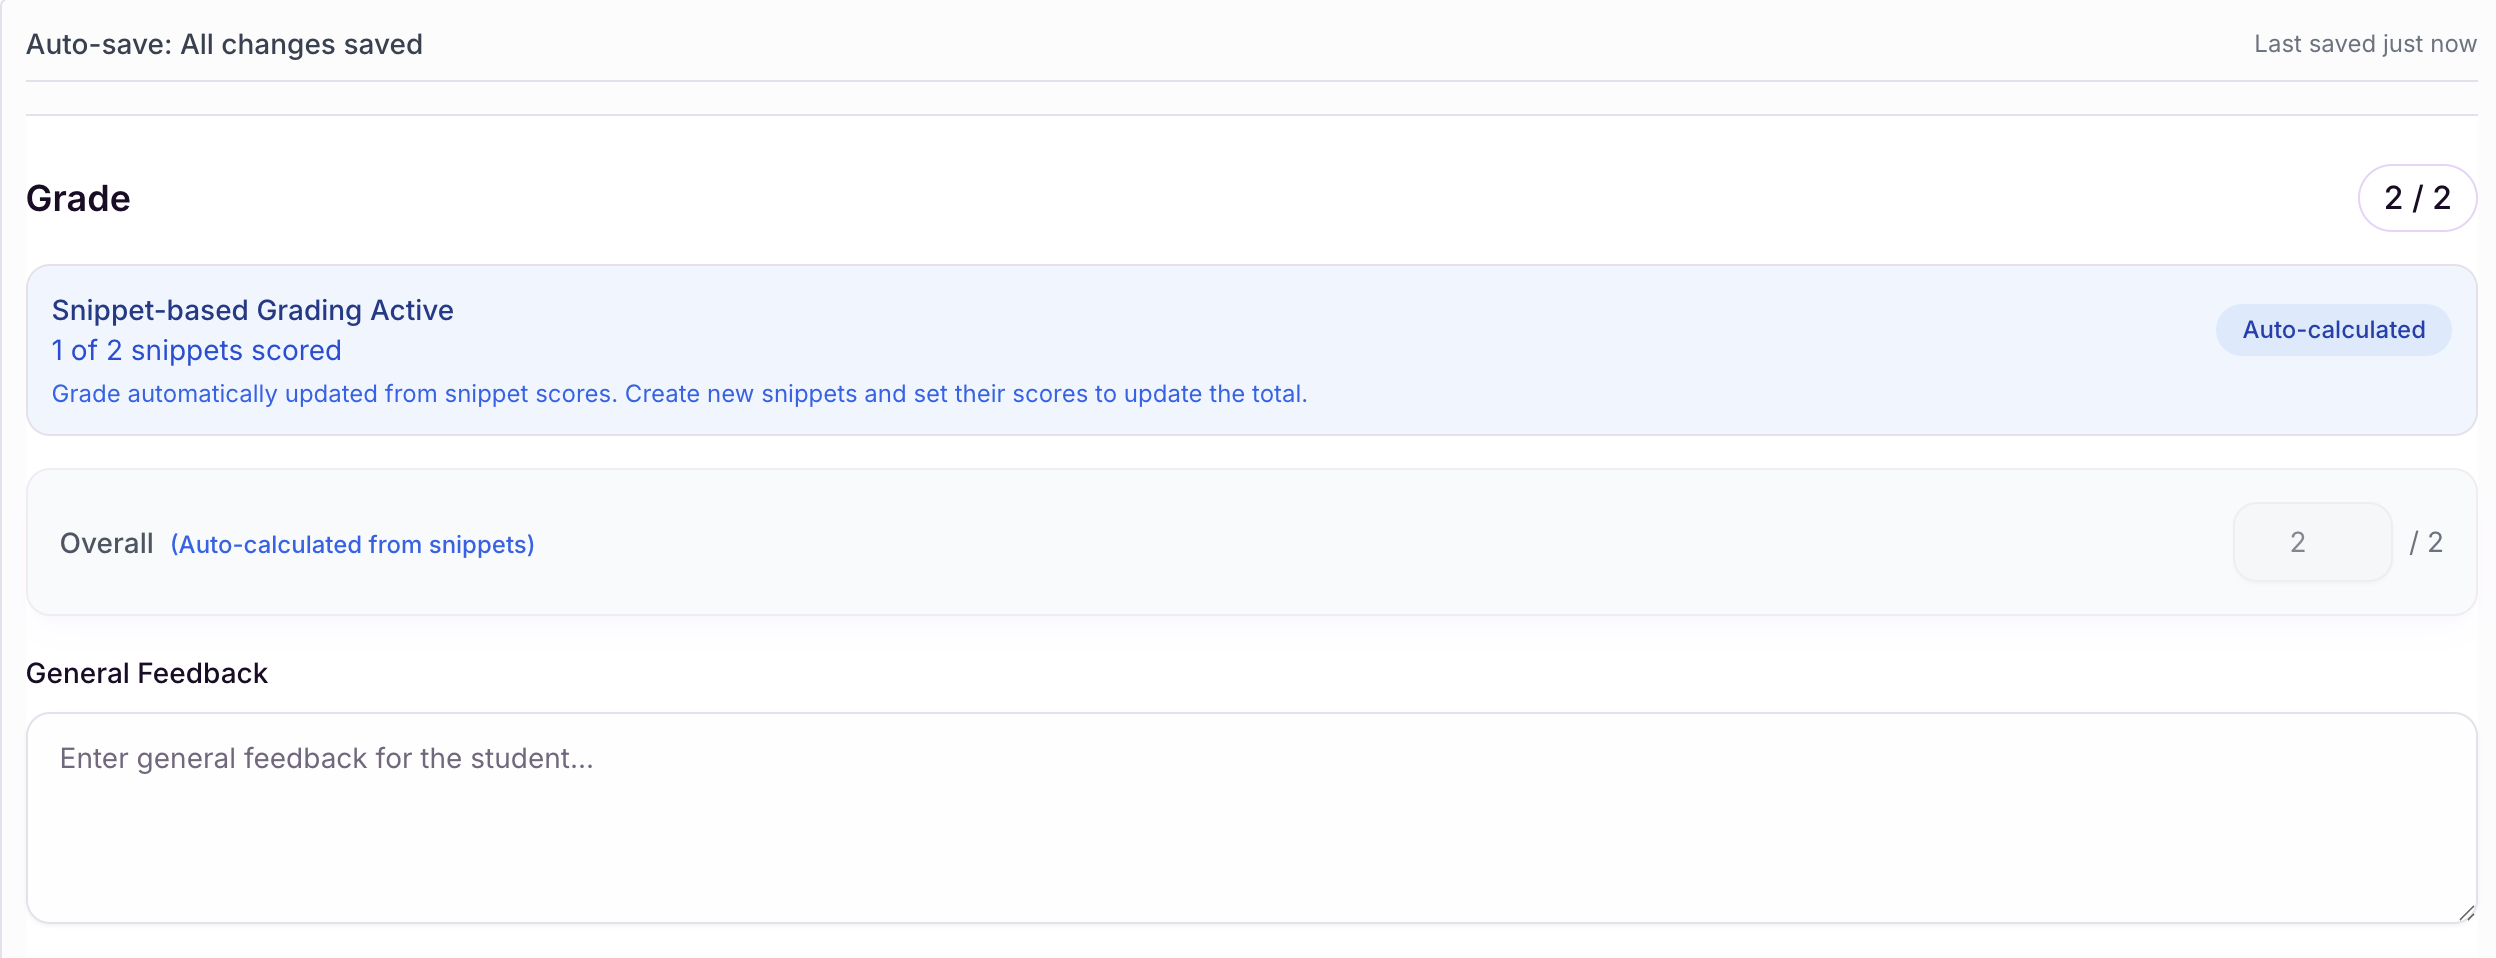
For both types:
- Add General Feedback in the grade panel — this appears at the top of the student's feedback view alongside their grade
- Click
Save Gradeto save scores and feedback without finalising
Finalising a Submission
- Click
Mark as Completeto finalise the submission - The submission stays in Pending Marking but gets a Finalised badge with the final score displayed
- The student can immediately see their annotated work, snippet comments, and grade in their student portal

Reviewing Marked Submissions
The Review Interface
Clicking a Finalised submission opens it in a read-only review view.
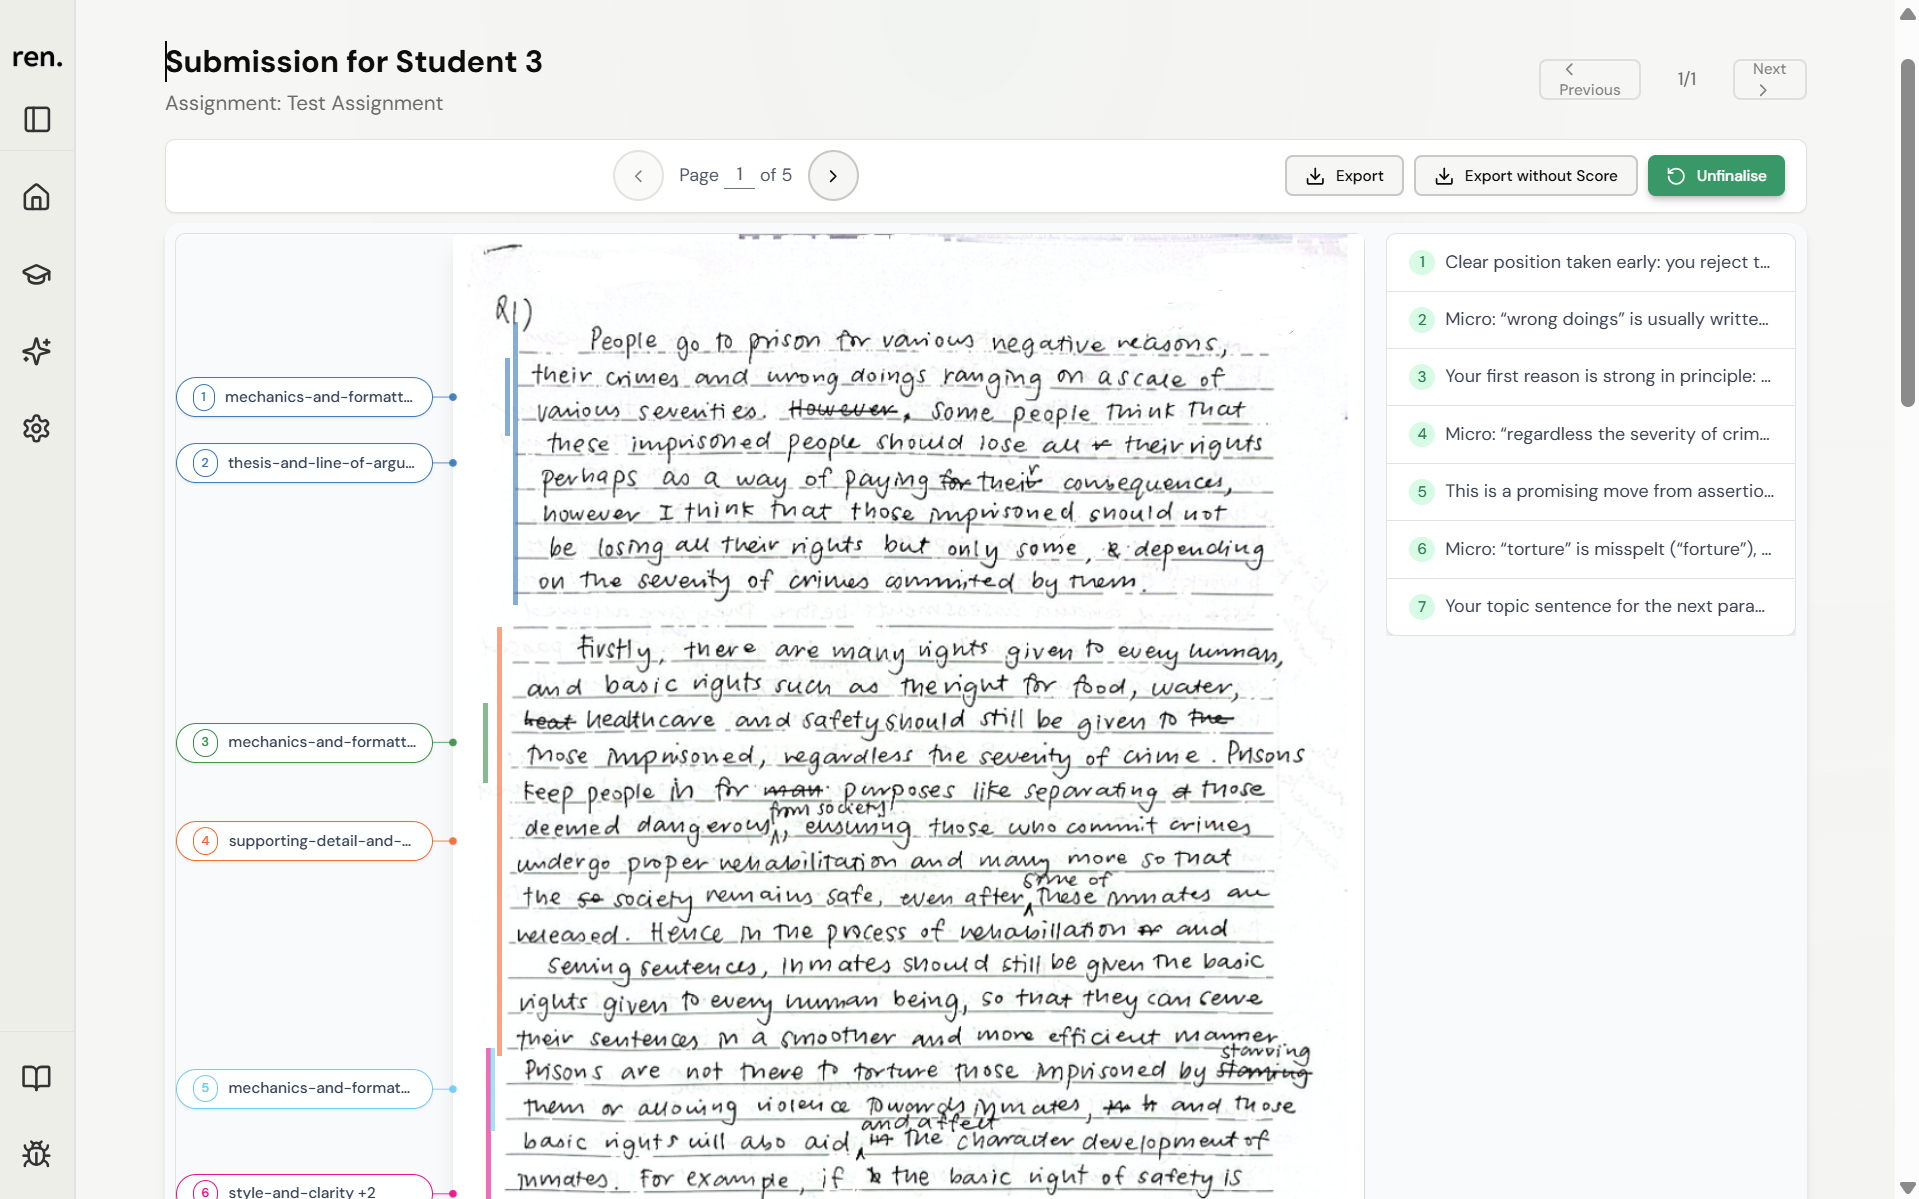
The toolbar at the top has the following controls:
- Page navigation — step through pages (e.g.
Page 1 of 5); click the page number to jump directly Export— download the PDF with all annotations, comments, and scoresExport without Score— download the PDF with annotations and comments but no scoresUnfinalise— remove the Finalised badge so you can edit the submission again
A Previous / Next navigator at the top right lets you move between students' submissions without going back to the assignment page.
The PDF is read-only here — you can't drag new snippets or edit existing annotations. Use Unfinalise first if you need to make changes.
When you unfinalise a submission, the student's view of that feedback is removed from their portal immediately. They can't see their grade, annotations, or summary again until you finalise. Use this only for genuine corrections.
Grade Overview and Submission Summary
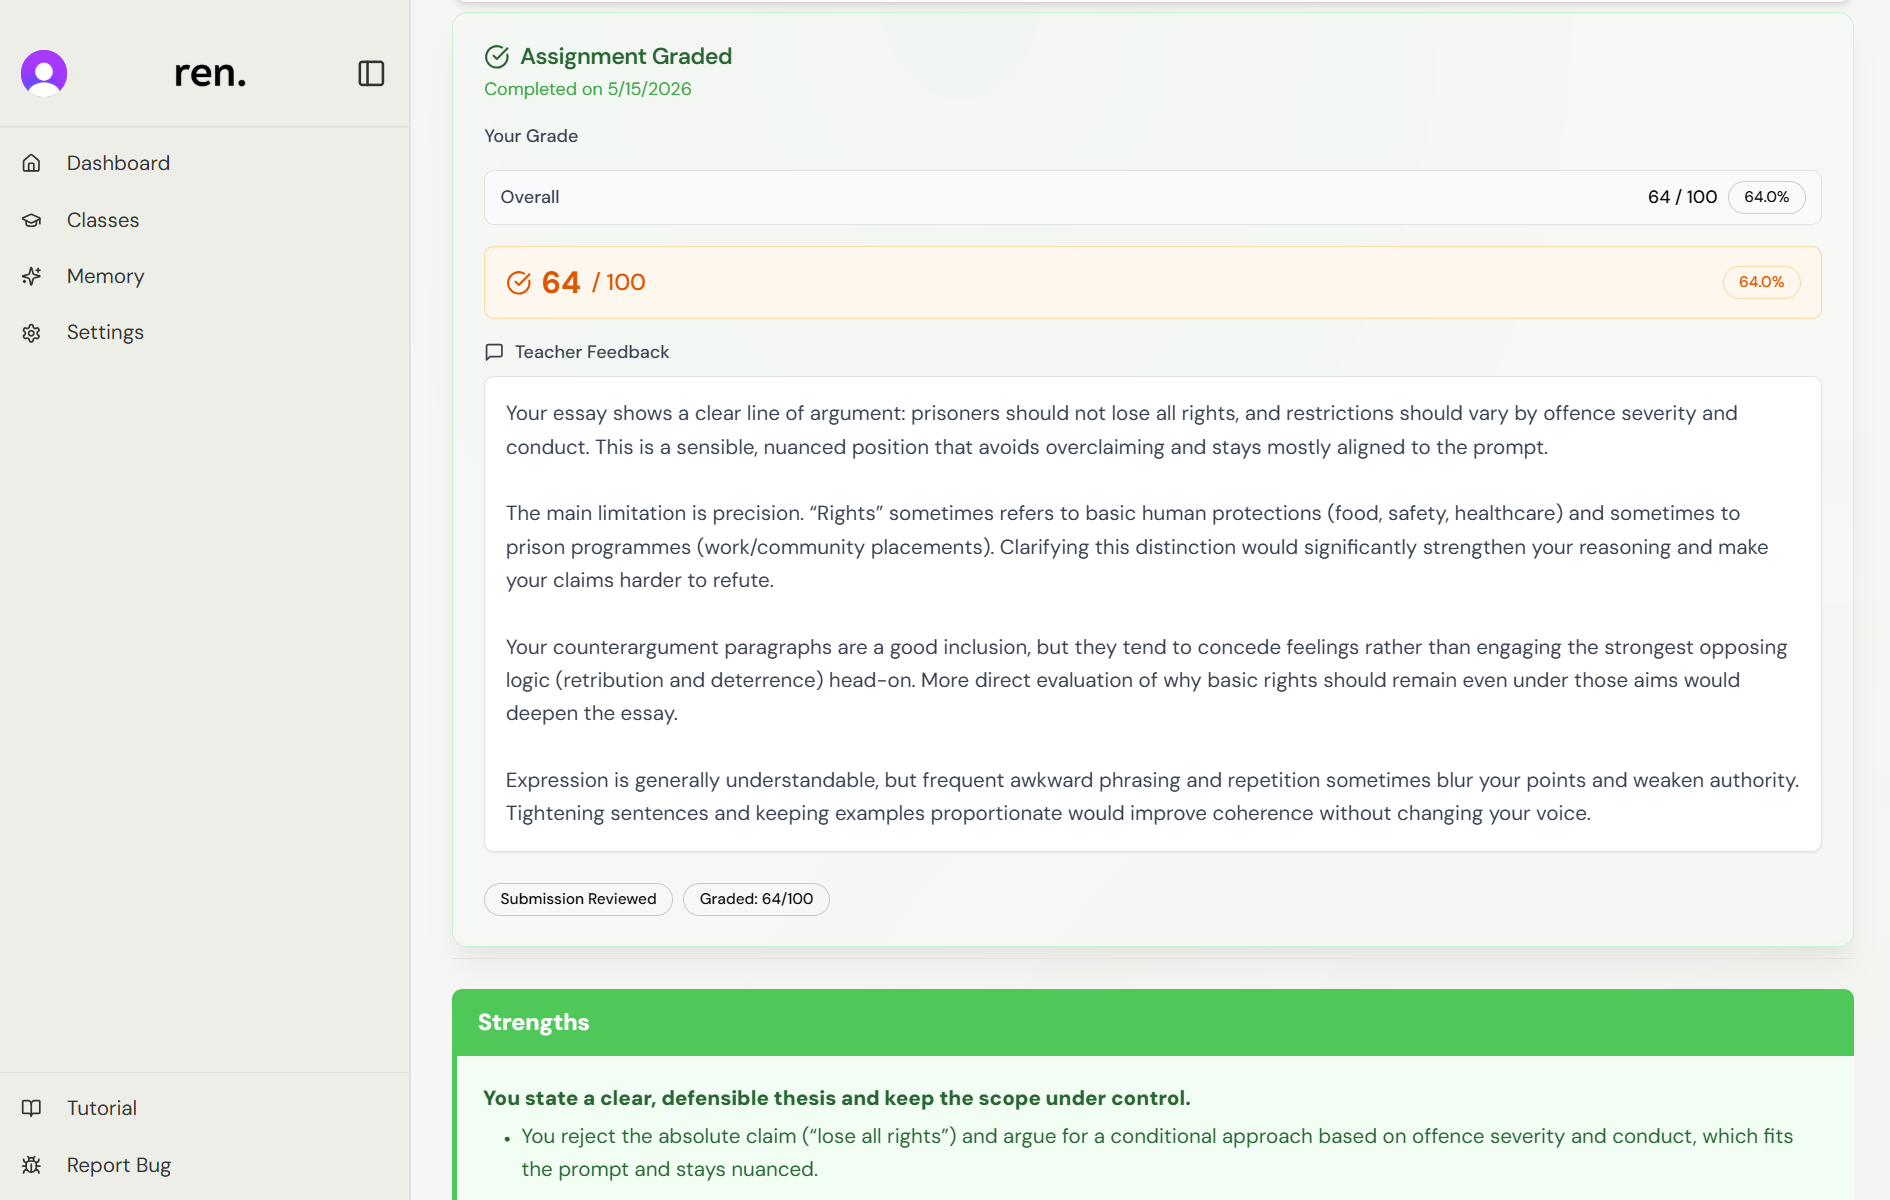
The Assignment Graded card shows:
- Completed on [date] — when the submission was finalised
- Your Grade — the Overall component breakdown plus a large colour-coded score badge (red, amber, or green based on percentage)
- Teacher Feedback — the general feedback you wrote in the grade panel during marking
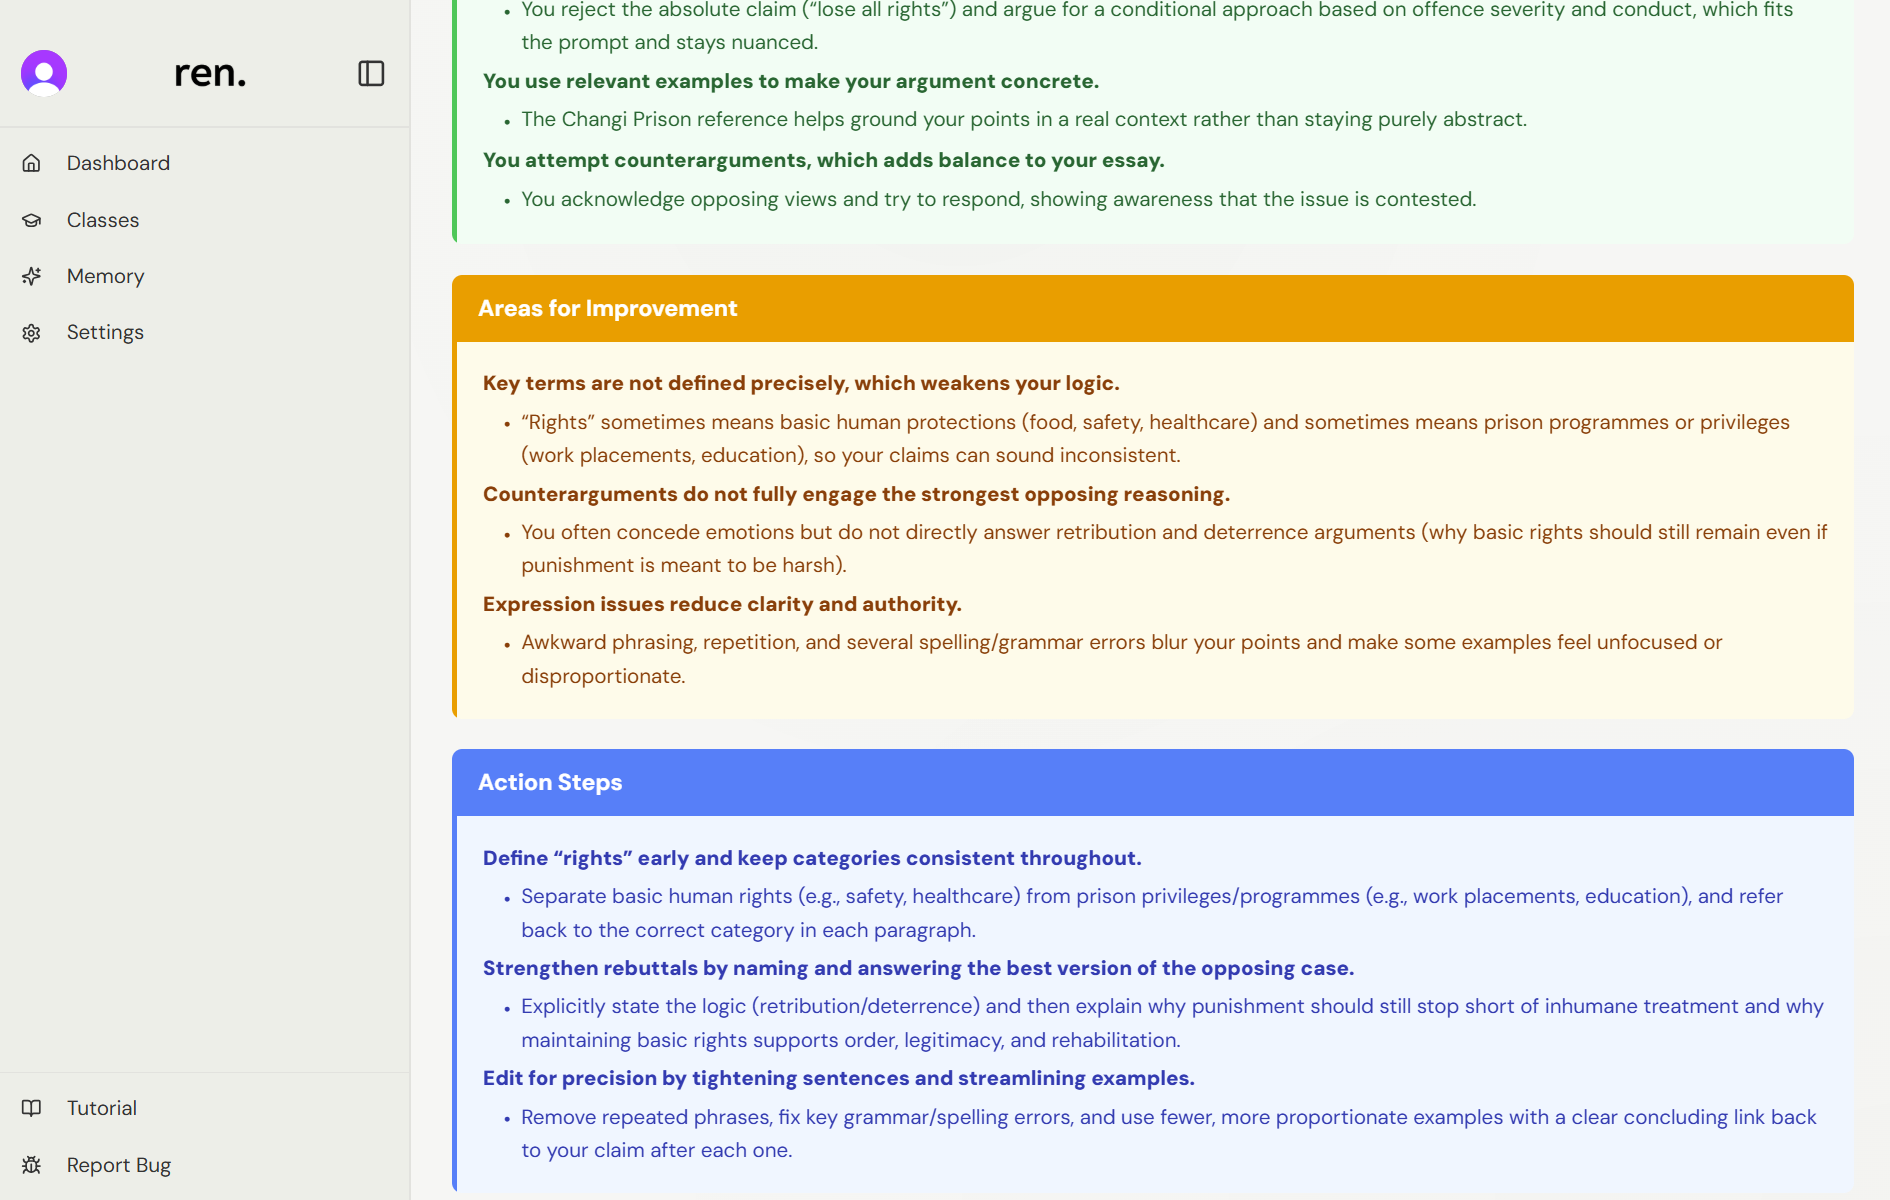
Below the card, Submission Reviewed is an AI-generated breakdown organised into three colour-coded sections:
- Strengths (green) — what the student did well, with bolded headlines and supporting detail
- Areas for Improvement (orange) — where they fell short, with bolded headlines and supporting detail
- Action Steps (blue) — concrete next steps the student can act on
The summary is generated when you finalise a submission. Students see all of this in their portal too.
What Students See
Once finalised, students see in their portal:
- The annotated PDF with snippet overlays
- The comment and tags on each annotation
- Their grade breakdown and Teacher Feedback
- The AI-generated summary (Strengths, Areas for Improvement, Action Steps)
Students can't edit the PDF or annotations, but they can open a per-snippet chat with the AI to ask about specific feedback, and they can download the marked PDF themselves.
Assignment Analytics and Insights
Once submissions are marked, panels at the bottom of the Assignment Detail page surface class performance.
Score Distribution
- The Submission Analytics card shows a box plot of grades across all marked submissions — minimum, maximum, median, and quartile spread
- The chart appears once at least one submission has been graded, and updates as you mark more
- Use it to spot whether the class clusters around a score or is spread widely — the latter often points to a topic worth revisiting
QnA Analytics
(QnA only) Additional analytics appear below the box plot — built from snippet scores, Bloom levels, and topic tags across all marked submissions:
- Insights Summary — an auto-generated narrative highlighting the strongest and weakest areas across the class
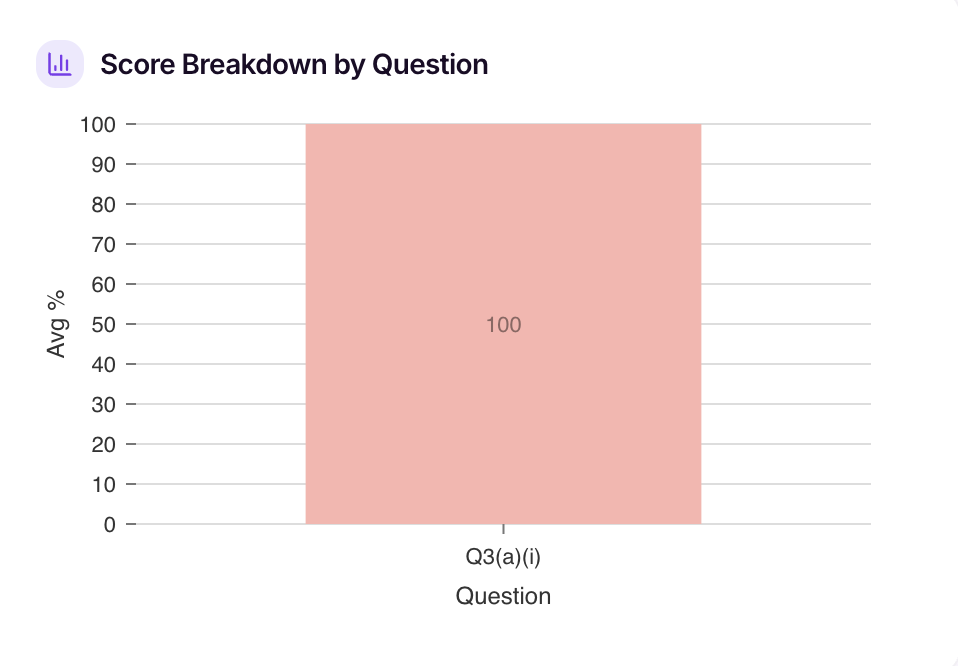
- Score Breakdown by Question — average percentage achieved on each question (e.g.
Q1,Q2), as a bar chart - Bloom's Taxonomy Performance — average percentage achieved at each cognitive level (Remember, Understand, Apply, Analyze, Evaluate, Create), as a radar chart. Appears once at least three Bloom levels have data
- Topic Performance — average percentage achieved per topic tag, as a horizontal bar chart
- Question Type Performance — average percentage achieved by question type, as a bar chart. Appears when more than one question type is in use
Use these to identify class-wide weak spots — for example, a Bloom level the class is consistently underperforming on, or a topic that needs re-teaching.
Assignment Snippets
The Assignment Snippets section gathers every feedback snippet you've made across all submissions for this assignment, grouped by tag. Each card shows:
- A thumbnail of the highlighted passage
- The student's name and assignment
- A score badge (e.g.
8/10) indicating graded vs pending (QnA only) - The question the snippet belongs to (QnA only)
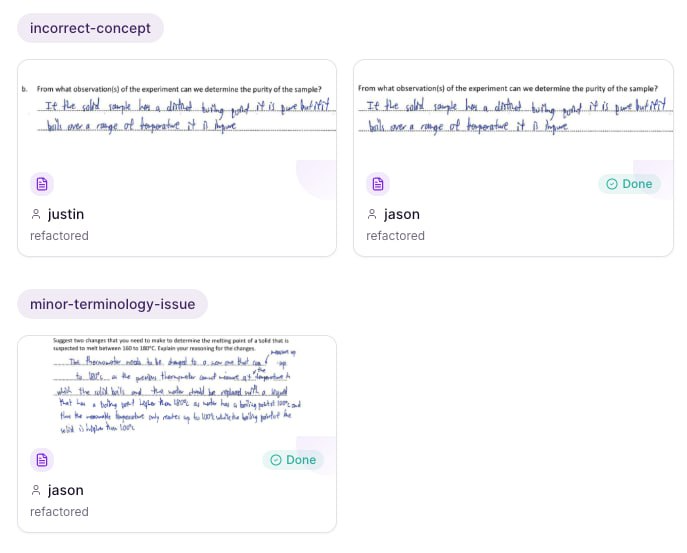
Click any card to jump straight to that snippet in the marking or review interface.
Filtering Snippets:
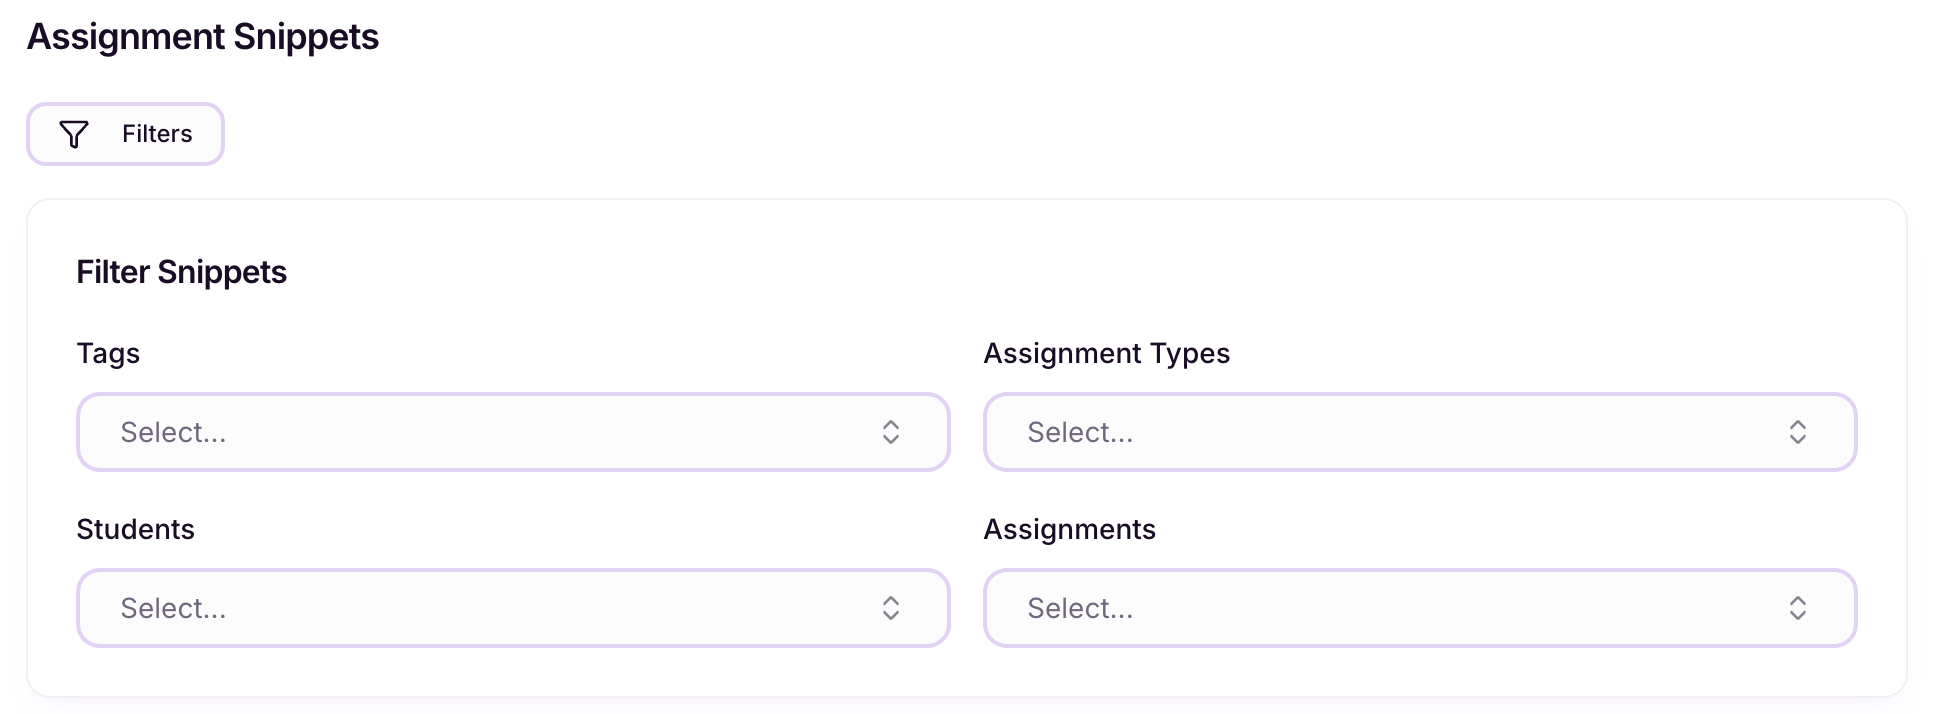
Use the Filters button to narrow the list by:
- Tags — show snippets with a specific label (e.g.
needs-evidence,strong-argument) - Students — restrict to one or more students
- Assignment Types — filter by the assignment-type label
Active filters appear as removable badges below the filter panel — clear them individually or all at once.