Add students to your class
Before you start
- Create the class first.
- Have your students' names ready. Email addresses and school IDs are optional.
Open the Students page
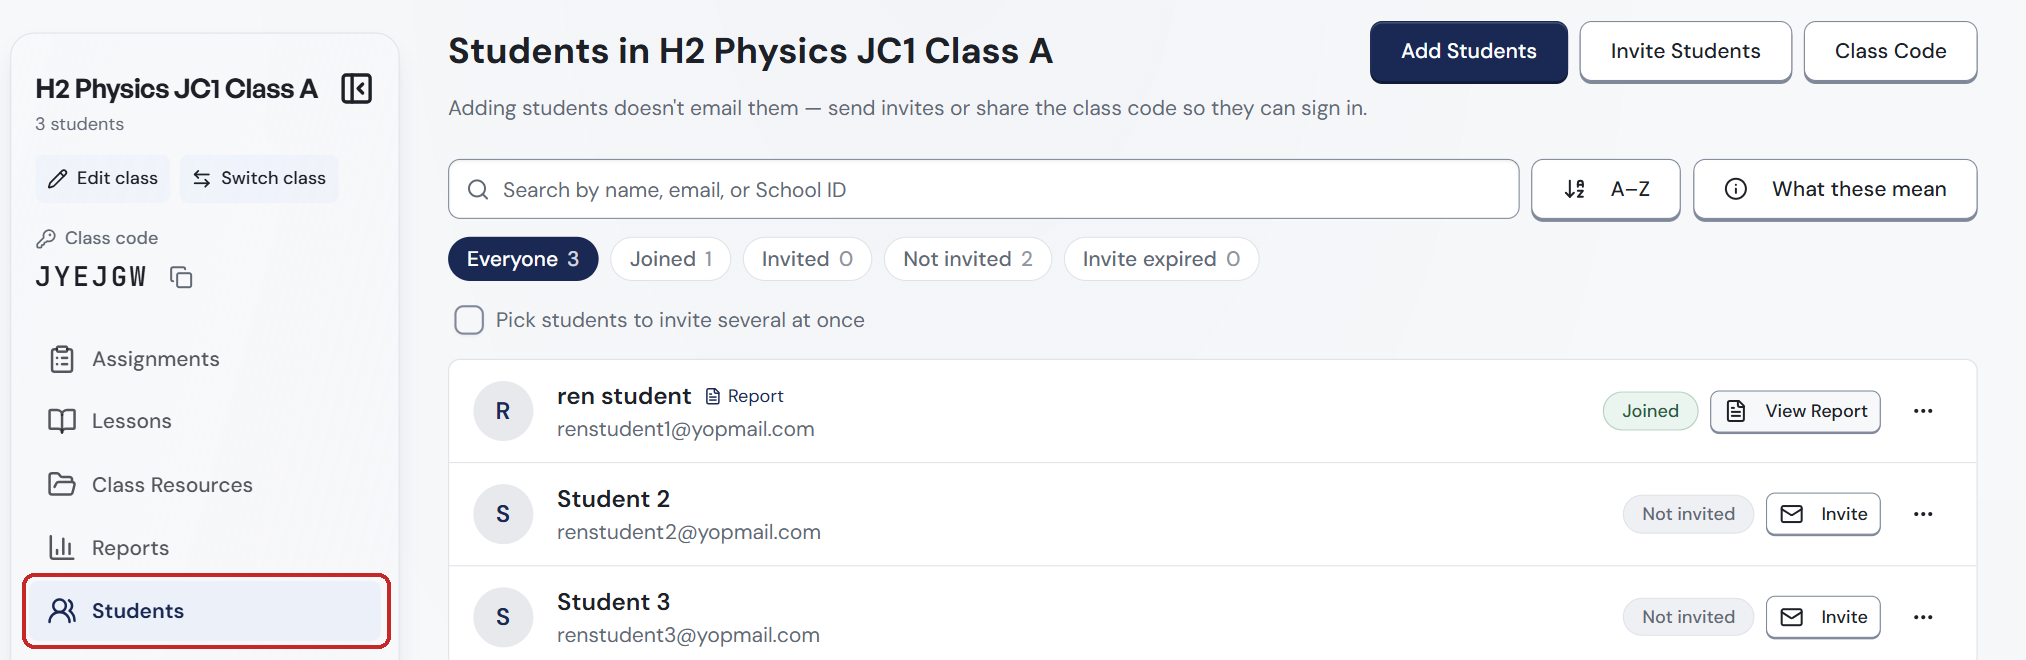
After you create a class, its Students page opens by itself, showing No students yet. To get back to it later, open the class and click Students in the class menu on the left.
Add students one by one
- On the class's Students page, click Add Students at the top right. The Add Students box opens.
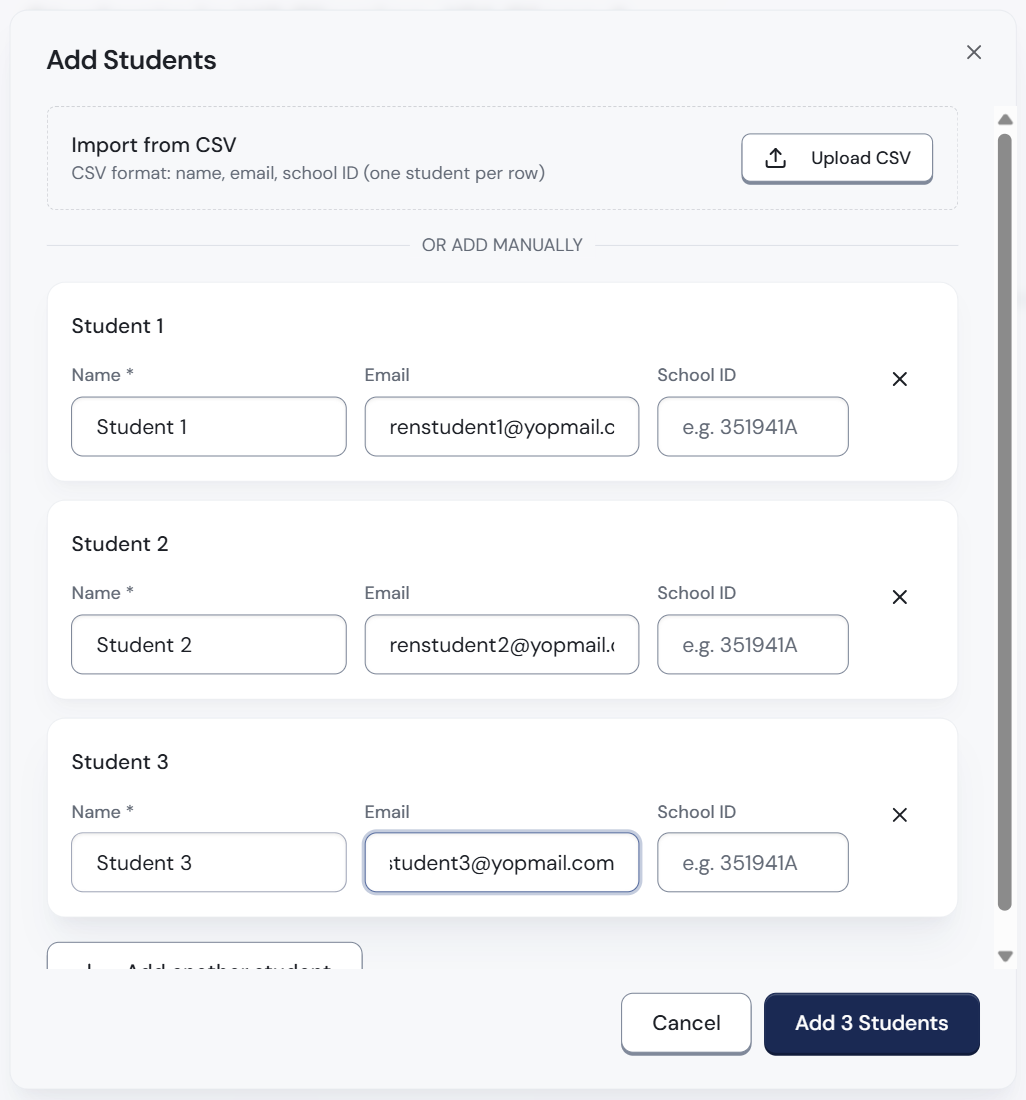
- Under Or add manually, in the Student 1 box, type the student's Name. Only this field is required (it is marked with
*). - Type their Email if you have it. It is optional, but you need it to send them an invite later.
- Type their School ID (optional), for example 351941A.
- Click Add another student for another box.
- To remove a box, click the X on its right.
- Click the button at the bottom, for example Add 3 Students. Your students appear on the list. Click Cancel to close the box without adding anyone.
The box also shows your school's limit, for example School limit: 610/1000 students added.
Add many students from a spreadsheet
- Save your class list as a CSV file (in Excel, choose Save As and pick CSV). One student per row, in this order: name, email, school ID.
- Click Add Students.
- Under Import from CSV at the top of the box, click Upload CSV and choose your file. The box reminds you of the format: name, email, school ID (one student per row).
- A box appears for each student in your file. Check them, then click the Add ... Students button at the bottom.
Adding students does not email them. To let them sign in, send invites or share the class code. The Students page reminds you of this under its title.
Read the student list
Each row shows a student and whether they can sign in yet: their initial, name and email, a status badge, an Invite button (with an envelope icon; it says Re-invite once you've invited them) and a ... button.
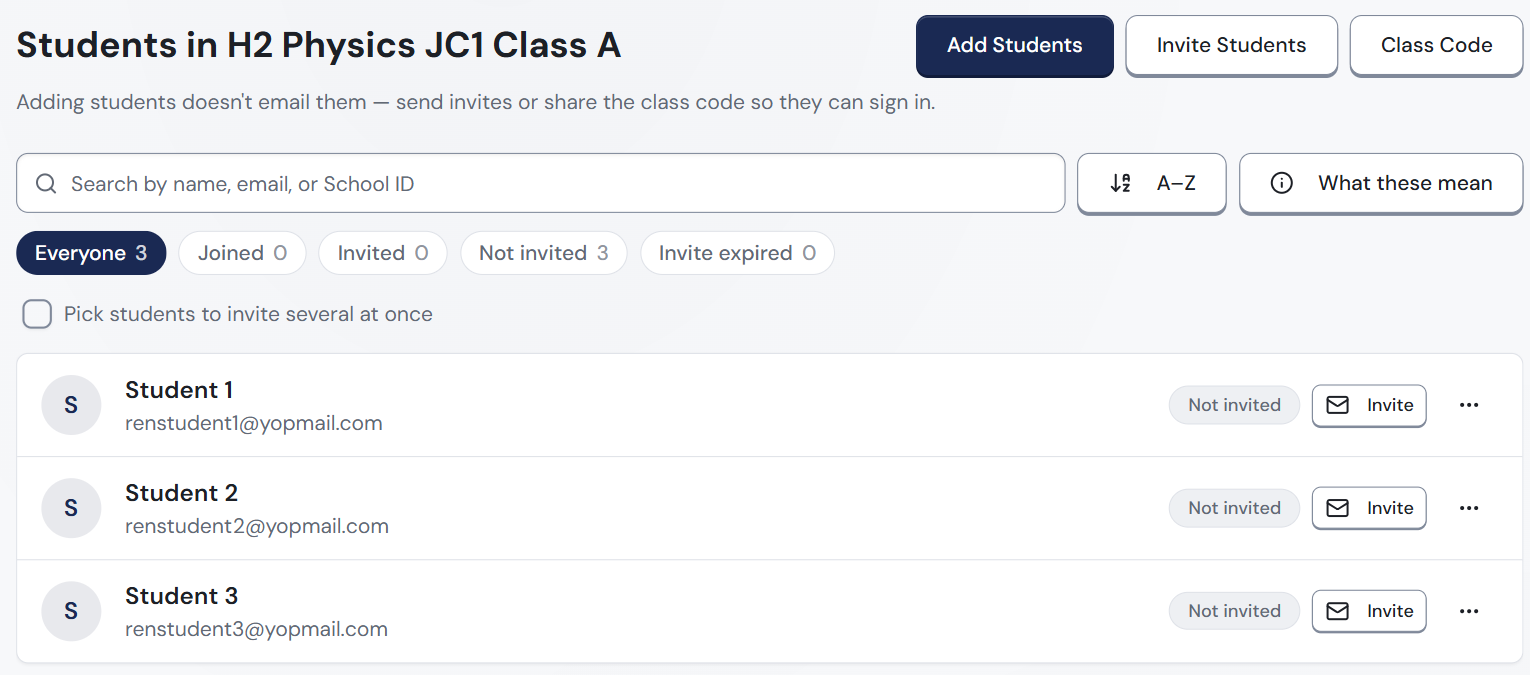
The status badge shows whether the student can sign in, and what to do next:
| Status | What it means | What to do |
|---|---|---|
| Joined | They have set up their account and can sign in and see their work. | Nothing. |
| Invited | You sent an invite; they have not joined yet. | Ask them to open the email from ren. and click Accept invitation. Can't find it? Ask them to check their junk folder, click Re-invite to send it again, or share the class code instead. |
| Not invited | No invite sent yet. | Click Invite on their row. No email? Click Add email first. |
| Invite expired | The invite ran out after 7 days. | Click Re-invite on their row, then ask them to click Accept invitation in the new email. |
Above the list:
- Search by name, email, or School ID: type to find a student.
- A-Z: sort the list alphabetically.
- What these mean: click for a reminder of what each status means.
- Everyone, Joined, Invited, Not invited, Invite expired: click one to show only those students. Each shows a count, for example Not invited 3.
- Pick students to invite several at once: tick this to choose students to invite together.
Students who have not joined still appear on the list, and you can still upload their scripts for them.
Edit a student's details
- Click the ... button at the end of the student's row.
- Click Edit. The Edit Student box opens.
- Change their details and save.
Remove a student from the class
- Click the ... button at the end of the student's row.
- Click Delete. A box asks Remove [name]?
- Click Remove. The student disappears from this class.
The student leaves this class only. Work they already submitted stays in your records, and you can add them back later.