Invite students to join your class
Students need to join before they can hand in work and see feedback. There are two ways: share the class code, or send email invites.
Before you start
- Add your students to the class.
- To send email invites, each student needs an email address on the list.
Option 1: Share the class code
The class code (a short code students type to join) works without email. Use it if invite emails get blocked.
- Open the class and click Students in the class menu.
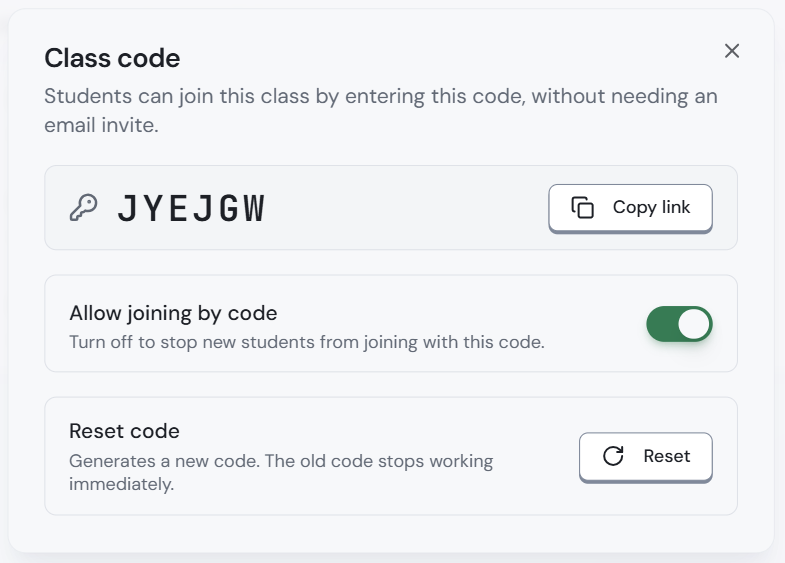
- Click Class Code at the top right. The Class code box opens, showing the code next to a key icon, for example JYEJGW.
- Show the code on the board, or click Copy link and paste the join link into your class chat.
The code is also shown in the class menu on the left, with a copy button.
What students do
- They go to renlearn.app/student and sign up.
- They type your code on the Join a class screen and click Continue.
- They check that the class name and your name are right, then click Join and the class name.
If they typed the wrong code, they click Use a different code.
Stop new students joining, or get a new code
Stop new students joining
Once everyone is in, switch Allow joining by code off (the switch is green while it is on). Nobody new can then join with the code, and the class menu says Joining is turned off.
Get a new code
If the code is shared with the wrong people, click Reset next to Reset code, then Reset code in the Reset class code? box to confirm (or Cancel). You get a new code, and the old code stops working at once.
Option 2: Send email invites
- Open the class and click Students in the class menu.
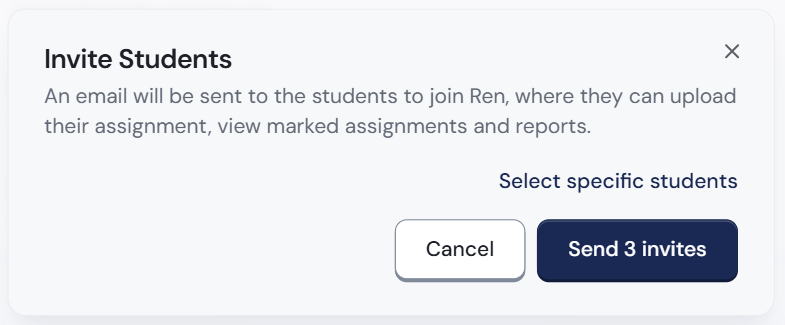
- Click Invite Students at the top right. The Invite Students box opens. It explains that students get an email to join ren., where they can upload their assignment and view marked assignments and reports.
- To invite only some students, click Select specific students and tick the ones you want.
- Click the send button, for example Send 3 invites. The number shows how many students will get an invite. A message appears: Invites sent successfully. Click Cancel to close the box without sending.
Each student gets an email with an Accept invitation button. Their row changes to Invited, with the days left before the invite expires.
To invite one student, click Invite (with the envelope icon) on their row. If they have no email yet, click Add email first.
To invite several from the list, tick Pick students to invite several at once above the list, tick the students, then click the invite button.
If an invite has expired (after 7 days), click Re-invite on the student's row.
School email filters sometimes block invites. Ask students to check their junk folder, or share the class code instead.