Create an assignment
Set up a new assignment for a class, such as a Paper 2 practice or a timed essay. It takes two short steps in one pop-up. Creating an assignment does not start marking.
Before you start
- Your class has students. See Add students. Students who have not joined yet still count.
- Have your answer scheme (your marking scheme) ready as a file: PDF, Word (DOCX), PowerPoint (PPTX) or a photo (PNG, JPG, JPEG).
Open the Create assignment pop-up
- Open the class and click Assignments in the class menu.
- Click Add New Assignment at the top right. The Create assignment pop-up opens, with two steps: Grading and Details.
Step 1: Grading
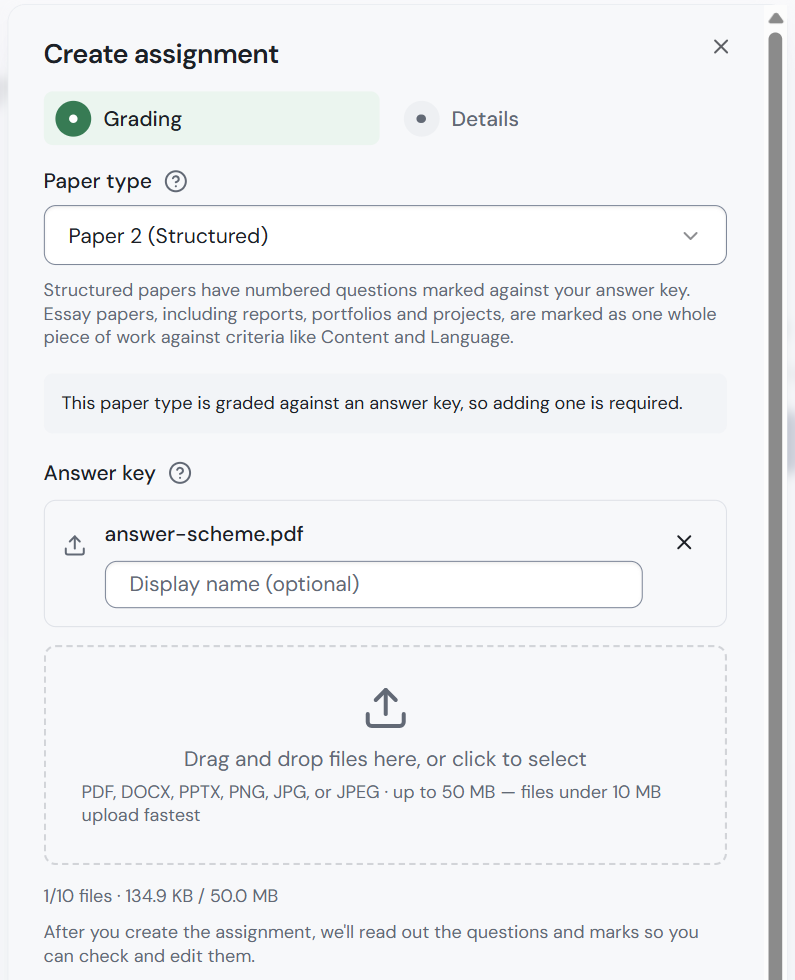
- Choose your paper from the Paper type dropdown, for example Paper 2 (Structured). The list depends on your class's subject. Not sure? See Choose a paper type.
- Drag your answer scheme into the Answer key box, or click the box to pick it.
- For a Structured paper (question by question), an answer scheme is required. The pop-up says This paper type is graded against an answer key, so adding one is required.
- For an Essay paper, choose Yes, I'll add it and upload it, or Not yet to add it later.
- Each file you add is listed with an optional Display name box. Click × to remove a file.
- Optional: add the Question paper. This helps ren. find each answer in a student's script.
- Click Continue.
Each paper type shows how it is marked, in brackets:
- Numbered questions, each with its own marks: pick one marked (Structured). An answer scheme is required.
- One piece of writing, marked on Content and Language: pick one marked (Essay). You can add the answer scheme later (Not yet).
- Nothing fits: pick Custom... at the bottom of the list.
The clearer your answer scheme shows where each mark is earned, the closer ren.'s marks will be to yours. After you create the assignment, ren. reads out the questions and marks so you can check and edit them.
File limits, and using your own marking instructions
File limits: the Answer key and Question paper boxes each take up to 10 files, up to 50 MB in total. Files under 10 MB upload fastest. Under the box, a counter shows what you have added, for example 1/10 files · 134.9 KB / 50.0 MB.
Your own marking instructions (for example, "be strict on units"):
- In Step 1, click Advanced grading options.
- Pick your saved set from the Custom grading instructions dropdown.
Leave it on Use default grading instructions if you are not sure. To write your own, see Your marking style.
Step 2: Details
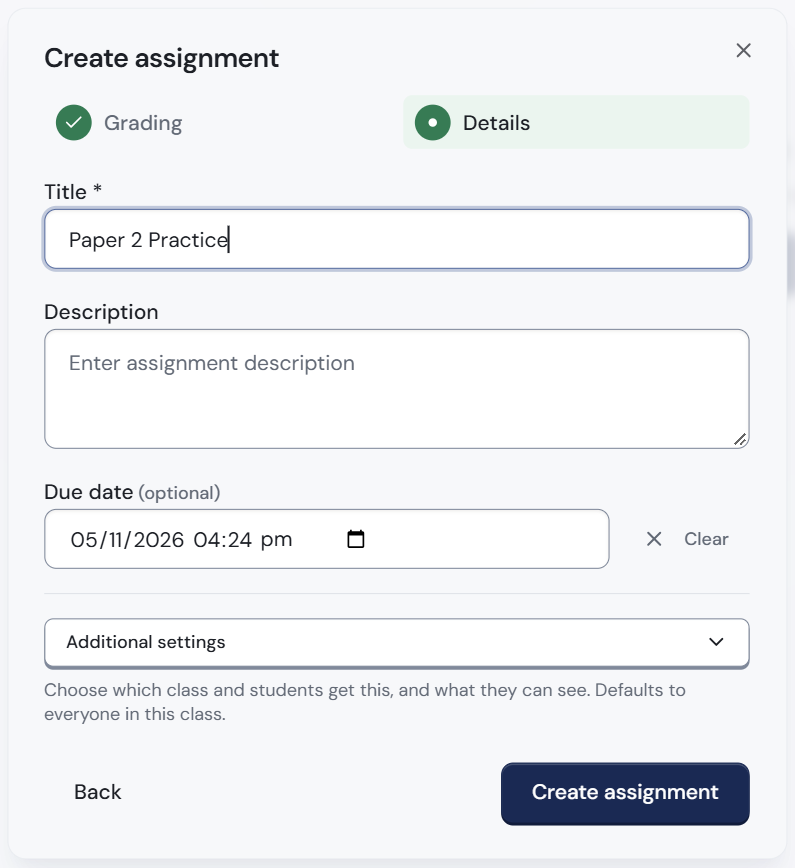
- Type a Title, for example Paper 2 Practice. This is the only required field (marked with an asterisk).
- Optional: type a Description for your students, and set a Due date (click Clear to remove it).
- Click Create assignment. To go back to Step 1, click Back.
The assignment appears on your Assignments page. If you added an answer scheme, ren. starts reading it. This takes a few minutes. Creating an assignment does not start marking.
Additional settings
All optional; most teachers leave them as they are. Click Additional settings in Step 2 to see them. Here you choose which class and students get the assignment, and what they can see. By default, the assignment goes to everyone in the class and students see their scores once you release results.
Untick Show scores to students to give feedback without marks. Students then see your comments but no marks.
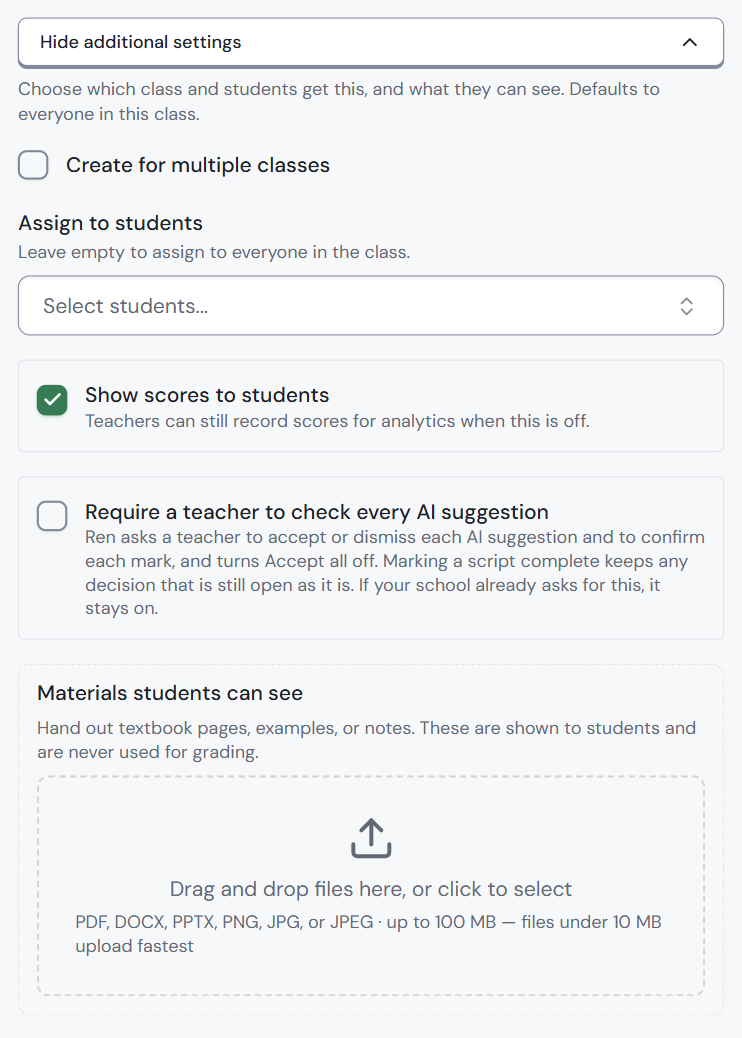
What each setting does
- Create for multiple classes: tick to set the same assignment for several classes at once.
- Assign to students: choose only some students with Select students.... Leave it empty for the whole class.
- Show scores to students: see below.
- Require a teacher to check every AI suggestion: a teacher must accept or dismiss each AI suggestion before a script can be finished, and Accept all is turned off. If your school already requires this, it stays on.
- Materials students can see: handouts such as textbook pages or notes. They are never used for marking.
- Check the question mapping first: only on some assignments. ren. waits to mark until you confirm which answer goes with which question.
Show scores to students
Ticked by default. Untick it to give feedback without marks: when you release results, students see your comments and written feedback, but no total, no mark for each question and no Content or Language marks. ren. still records the marks for your reports, and the assignment shows Scores hidden from students.
This setting does not release anything. You can change it later in Assignment settings. See Release results to students.