Share lessons and resources with your class
Class Resources holds your files. Lessons groups files, assignments and links under one topic or date.
Upload files to Class Resources
- Open the class and click Class Resources in the class menu.
- Click Upload at the top right. The Upload Files box opens.
- To keep the files hidden from students, switch Make files private on.
- Drag your files into the box, or click it to choose files from your computer. To upload a whole folder, click Select Folder Instead. You can upload PDF, DOCX, PPTX, PNG, JPG or JPEG files, up to 100 MB each.
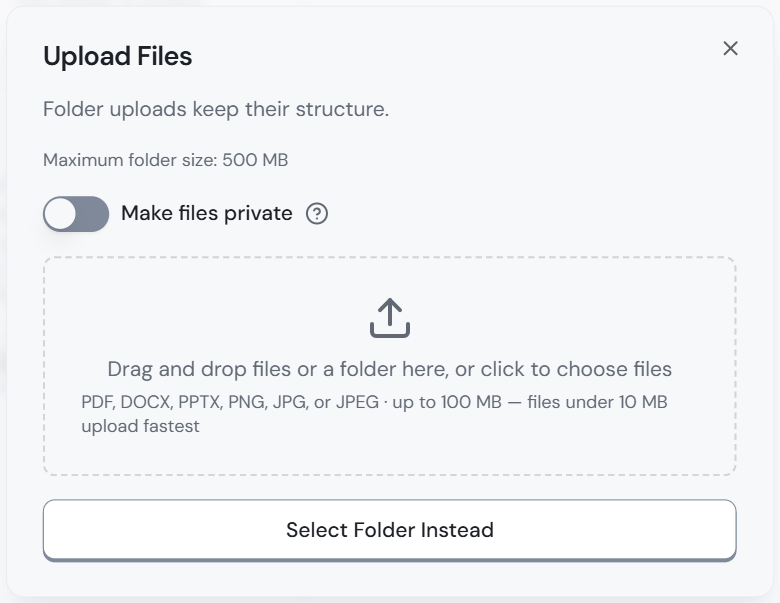
The files appear in the Files list on the left. Click one to see it on the right.
Students in this class see uploaded files straight away, unless you make them private or set a release date.
To keep things tidy, click New Folder, then upload into it.
Hide a file or choose when students see it
- Hover over the file and click its ... button.
- Click Permissions. The Edit File Settings box opens.
- Switch Private file on to hide it from students, or off to show it.
- To show it later, pick a Release Date. Pick both the date and the time. Students see the file only once that date and time have passed.
- Click Save Changes.
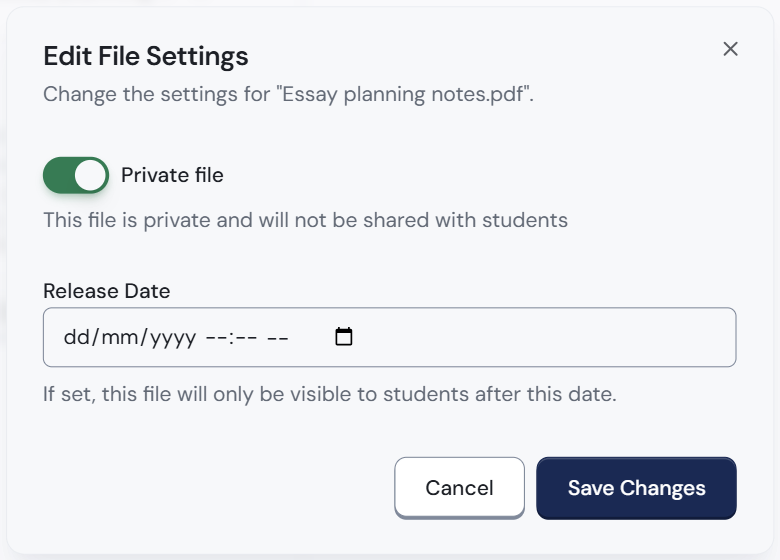
To plan a term, upload all your handouts at the start, each with its own release date. Each file appears for students at its release date and time. This also applies inside a lesson: a file in a lesson stays hidden until its release date, whatever date the lesson has. A private file never appears.
The same ... menu also lets you Rename, Move or Delete a file. ren. asks Delete this file? You can't undo this.; click Delete to confirm or Keep to cancel. Deleting a folder deletes everything inside it.
Create a lesson
- Open the class and click Lessons in the class menu.
- Click Create Lesson at the top right. The Create New Lesson box opens.
- Type a Title, for example Kinematics.
- Pick a Date.
- Type a short Description if you want to.
- Click Create Lesson. A card for the lesson appears.
Each card shows the date and how many resources and assignments it holds.
Add things to a lesson
Click a lesson card to open it. It has three sections:
- Resources: click the + button next to Resources, tick the files you want, then click Save Changes.
- Assignments: click the + button next to Assignments, tick the assignments, then click Save Changes.
- Links & References: click Add Link, type a Title and the URL (the web address), then click Add Link in the box.
To change the lesson's title, date or description, click the pencil button at the top right of the lesson.
To delete a lesson, click the bin button next to the pencil, then click Delete lesson. Its files and assignments stay in your class, no longer grouped under that lesson.